

To start composting in a five-gallon bucket, drill holes for airflow, then layer green and brown materials accordingly. Add garden soil to boost decomposition and seal with a lid for proper moisture control. Monitor temperature changes and moisture levels while troubleshooting common issues like adjusting the Carbon-Nitrogen balance. Enhance your compost with worms for faster decay. Upcycling your compost bucket can be a cost-effective recycling method for sustainability.
Materials Needed
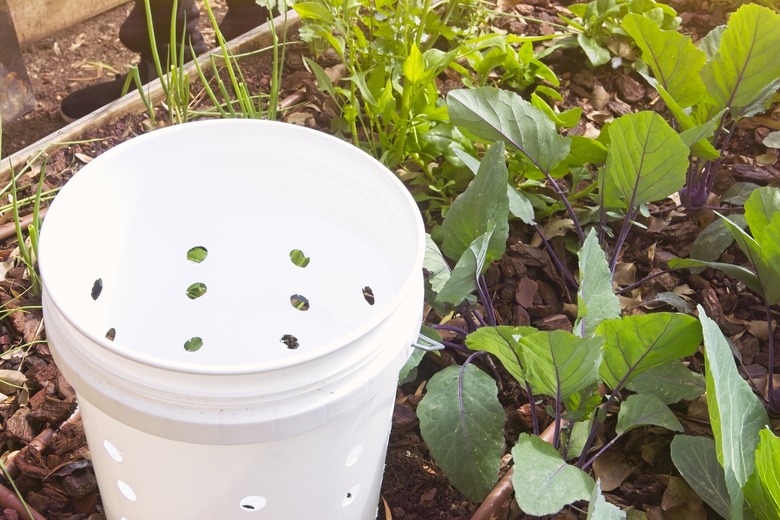
For starting composting in a five-gallon bucket, gather essential materials like a 5-gallon bucket with a lid, a drill for creating drainage holes, small sticks for airflow, green materials such as fruit scraps and grass clippings, and brown materials like shredded paper and dried leaves. The bucket should be equipped with holes drilled in the bottom and sides to ensure proper drainage and airflow, preventing mold formation and fostering decomposition. Placing small sticks at the bucket’s base aids in drainage, while a layer of brown materials on top supports effective decomposition. It is crucial to add compost materials in layers, alternating between green materials rich in nitrogen and brown materials high in carbon, ensuring proper airflow for optimal composting conditions. To expedite the composting process, periodically roll the bucket to evenly distribute moisture and heat. By incorporating these materials and techniques, you can kickstart the composting process efficiently in your five-gallon bucket.
Drilling Air Holes
:max_bytes(150000):strip_icc()/SPR-how-to-garden-with-buckets-8575698-03-22985a1926ac491da188cba3a2ce2f7d.jpg)
To ensure proper aeration, drill 10-15 holes in the bottom of the bucket when setting up your composting system in a five-gallon container. Space these holes evenly to promote adequate airflow throughout the compost materials. It is essential to choose a drill bit size that prevents the compost from spilling out while still allowing for ventilation. In addition to the bottom holes, consider drilling extra holes along the sides of the bucket to further enhance ventilation. Proper ventilation is crucial for maintaining oxygen levels necessary for the microbes responsible for breaking down the compost effectively. By ensuring your bucket has a sufficient number of air holes, you create an environment conducive to the composting process. Adequate aeration will prevent your compost from becoming anaerobic, leading to foul odors and slowing down the decomposition process. Keep in mind that these air holes play a vital role in facilitating proper airflow within your composting setup.
Layering Compost Materials
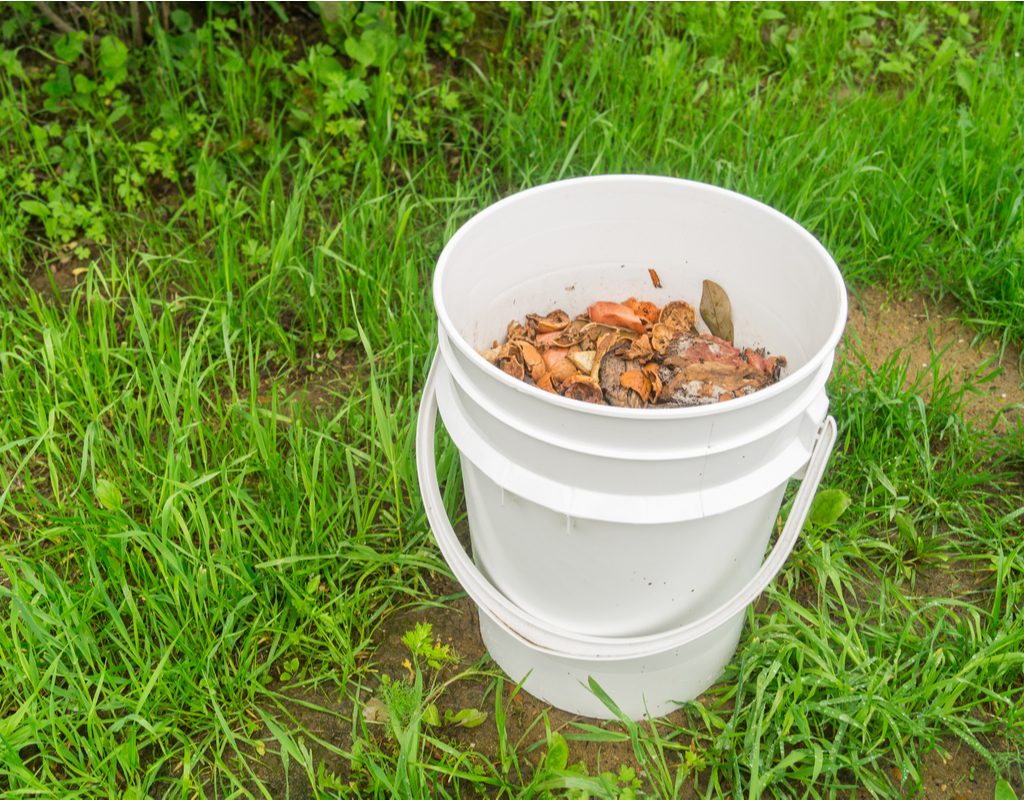
Consider layering green and brown compost materials in your five-gallon bucket to facilitate effective decomposition. By alternating between green materials such as kitchen scraps and brown materials like dried leaves or shredded paper, you can create a balanced environment for composting. Here’s how to layer your compost materials effectively:
- Start with a layer of brown materials: Begin by adding a layer of dried leaves or shredded paper at the bottom of the bucket.
- Add a layer of green materials: Follow the brown layer with kitchen scraps like fruit and vegetable peels or coffee grounds.
- Continue alternating layers: Repeat the process, alternating between green and brown materials until the bucket is nearly full.
- Top it off: Finish with a layer of brown materials to cover the top of the compost pile.
Adding Garden Soil
:max_bytes(150000):strip_icc()/SPR-how-to-garden-with-buckets-8575698-05-c0ebc97752814722b6d13ac5afc57e8d.jpg)
Layering green and brown compost materials in a five-gallon bucket sets the stage for effective decomposition; adding garden soil further enhances the process by introducing crucial microbes. Garden soil plays a vital role in jumpstarting the decomposition process within the composting bucket. By adding just a couple of cups of garden soil, you provide the necessary organisms and nutrients required to break down organic materials efficiently. This addition creates a conducive environment for beneficial bacteria and microorganisms to thrive, accelerating the breakdown of organic matter. The garden soil aids in the creation of a balanced ecosystem within the bucket, supporting the microbial activity essential for successful composting. It not only contributes to the decomposition process but also enriches the compost with valuable nutrients that will benefit your plants when the compost is ready for use. Incorporating garden soil into your composting setup is a simple yet effective way to boost compost production and ensure a rich, nutrient-dense end product.
Sealing With Lid

Sealing the five-gallon bucket with a lid is essential for maintaining optimal moisture levels and creating a controlled environment for efficient composting. Here are some key points to consider when sealing the lid:
- Preventing Excessive Moisture: A tightly sealed lid helps prevent excessive drying out of compost materials, ensuring that the pile remains moist for decomposition.
- Regulating Airflow and Drainage: Proper sealing with a lid controls the airflow within the composting system, aiding in the regulation of temperature and odor.
- Keeping Pests Out: The lid acts as a barrier against pests that may disrupt the composting process, keeping the environment undisturbed.
- Using Holes in the Lid: Consider adding small holes in the lid to allow for some airflow while still maintaining a controlled environment. Additionally, ensure there are bottom drainage holes to prevent waterlogging.
Maintaining Moisture Levels
To optimize the composting process in a five-gallon bucket system, maintaining appropriate moisture levels is crucial for facilitating efficient decomposition and the activity of beneficial microorganisms. The moisture content within the compost should ideally resemble that of a wrung-out sponge. This moisture level is vital for the breakdown of organic materials and provides an environment conducive to the proliferation of red wiggler worms, which play a key role in the composting process. If the composting material becomes too dry, consider adding water to rehydrate it. Conversely, if the compost is overly wet, incorporate additional dry bedding to balance the moisture levels. Adequate moisture not only supports the decomposition process but also helps in creating nutrient-rich compost. By regulating moisture levels, you are ensuring that the composting environment remains optimal for the activity of microorganisms and the overall success of the composting process in your five-gallon bucket system.
Monitoring Decomposition Progress
![Worm Farming and Composting in a 5-Gallon Bucket [It's Easy!] - Outdoor Happens Homestead](https://www.a-garden-diary.com/wp-content/uploads/2024/06/6081861708_5c5463b306_b.jpg)
When monitoring the decomposition progress in your five-gallon bucket compost system, it is essential to regularly assess temperature changes and moisture levels to ensure optimal conditions for efficient composting. Here are some key steps to effectively monitor the progress of your compost bucket:
- Check Temperature Changes: Utilize a thermometer to keep track of internal temperatures, aiming for the ideal range of 135-160°F (57-71°C) for optimal decomposition.
- Assess Moisture Levels: Regularly inspect the moisture content of your compost. The material should be damp, similar to a wrung-out sponge, to support the decomposition process.
- Observe Signs of Decomposition: Look for a decrease in volume and the breakdown of organic materials within the compost as indicators of successful decomposition progress.
- Document Progress: Maintain a log or journal to record observations, adjustments made, and any changes in the compost over time to track the development of your compost effectively.
Harvesting Compost

Check for a decrease in material level and observe the appearance of dark, crumbly compost to determine readiness for harvesting in your five-gallon bucket compost system. When the compost is dark, crumbly, and soil-like in texture, it indicates that the decomposition process is complete, and the compost is ready for harvesting. To ensure a finer consistency, use a compost sifter or screen to remove any remaining large particles from the finished compost.
Harvesting compost from your five-gallon bucket provides a nutrient-rich soil amendment that can enhance garden soil, boost plant growth, and support overall soil health. The harvested compost serves as a valuable resource for sustainable gardening practices by recycling organic waste into a beneficial product for your plants and the environment. By utilizing the nutrient-rich properties of the compost, you contribute to sustainable gardening efforts and promote a healthier ecosystem in your garden.
Troubleshooting Common Issues
Addressing common issues when composting in a five-gallon bucket involves adjusting the carbon-nitrogen balance, burying food scraps deeper, adding dry bedding as needed, ensuring proper aeration, and checking for any holes in the bucket to prevent worm escape.
- Adjust Carbon-Nitrogen Balance: If foul odors emanate from your compost pile, it may indicate an imbalance in the carbon-nitrogen ratio. Adjust by adding more carbon-rich materials like dry leaves or shredded paper.
- Bury Food Scraps Deeper: To avoid attracting pests such as flies or rodents, bury food scraps deeper within the compost pile.
- Maintain Proper Moisture Levels: If your compost becomes overly moist, incorporate more dry bedding materials like straw or sawdust to regulate moisture.
- Check for Holes in the Bottom: Ensure there are no holes in the bottom of the bucket to prevent worms from escaping and to maintain a healthy composting environment.
Enhancing Compost With Worms
To optimize the efficiency of your five-gallon bucket composting system, consider enhancing the compost with red wiggler worms for accelerated decomposition and nutrient-rich results. Red wiggler worms play a crucial role in composting buckets by breaking down organic matter efficiently, aerating the compost, and producing valuable worm castings. These worms thrive in the ideal conditions of a composting bucket, which is moist and oxygen-rich, aiding in the decomposition process.

Upcycling Compost Bucket
Consider repurposing a five-gallon bucket for composting to efficiently transform organic waste into nutrient-rich soil while minimizing environmental impact. Upcycling a five-gallon bucket for composting offers a sustainable solution that benefits both your garden and the planet. Here are some key steps to upcycle your bucket for composting:
- Drill Holes: Ensure proper airflow and drainage by drilling holes in the bottom and sides of the bucket.
- Layer Green and Brown Materials: Alternate layers of green (nitrogen-rich) and brown (carbon-rich) compost materials to facilitate balanced decomposition.
- Use a Tight-Fitting Lid: Control moisture levels and keep pests out by using a lid that fits securely on the bucket.
- Cost-Effective Recycling: Upcycling a five-gallon bucket for composting is a budget-friendly and space-saving way to recycle organic waste effectively.