

Large outdoor planters from garden centers routinely cost $50–$200+ each. But you can build equally attractive (and often more interesting) planters for a fraction of that price with basic materials and no specialized skills. These five methods range from a 30-minute fabric solution to a weekend concrete project.
Method 1: Poured Concrete Planters ($8–$15 Each)

Concrete planters are virtually indestructible and develop a beautiful patina over time. You need: a bag of Portland cement-based concrete mix (not fast-set), two containers for the mold (one large, one smaller for the inner cavity), cooking spray, and a dowel for drainage holes.
Steps:
- Spray cooking oil inside the outer mold and outside the inner mold (for release).
- Mix concrete per bag instructions to a thick-but-pourable consistency.
- Pour 2 inches of concrete into the outer mold as the base.
- Press the inner mold down into it, centering it. Weight it down with rocks or sand so it doesn’t float up.
- Fill the gap between the molds with concrete, tapping the sides to release air bubbles.
- Insert a greased dowel through the bottom for drainage before the concrete sets.
- Cover with plastic and let cure for 48 hours. Slowly remove the molds.
- Cure for another 5 days, misting daily. The longer you cure, the stronger the planter.
A 5-gallon bucket as the outer mold and a 2-gallon bucket as the inner creates a perfect medium planter. One 80-pound bag of concrete mix (about $6) makes 2–3 planters this size.
Method 2: Cedar Plank Planter Box ($20–$35)

Cedar naturally resists rot without chemical treatment, making it ideal for planters. A simple box design requires only a saw, drill, and screws.
Materials: Four 1×8 cedar boards (cut to length), one 1×8 board for the bottom (or use cedar fence pickets for economy), 2-inch exterior screws, and landscape fabric.
Steps:
- Cut two boards to your desired length and two boards to the width minus 1.5 inches (so they sit inside the long sides).
- Pre-drill holes to prevent splitting—cedar splits easily.
- Screw the four sides together into a rectangle.
- Cut bottom boards to fit. Attach with screws, leaving 1/4-inch gaps between boards for drainage.
- Line the inside with landscape fabric to retain soil but allow water through.
- Optional: add 2×2 corner legs for airflow underneath.
Cedar fence pickets ($3–$4 each at home improvement stores) are the budget shortcut. They’re thinner than standard lumber but last 5–8 years outdoors.
Method 3: Fabric Grow Bags ($3–$8 Each)
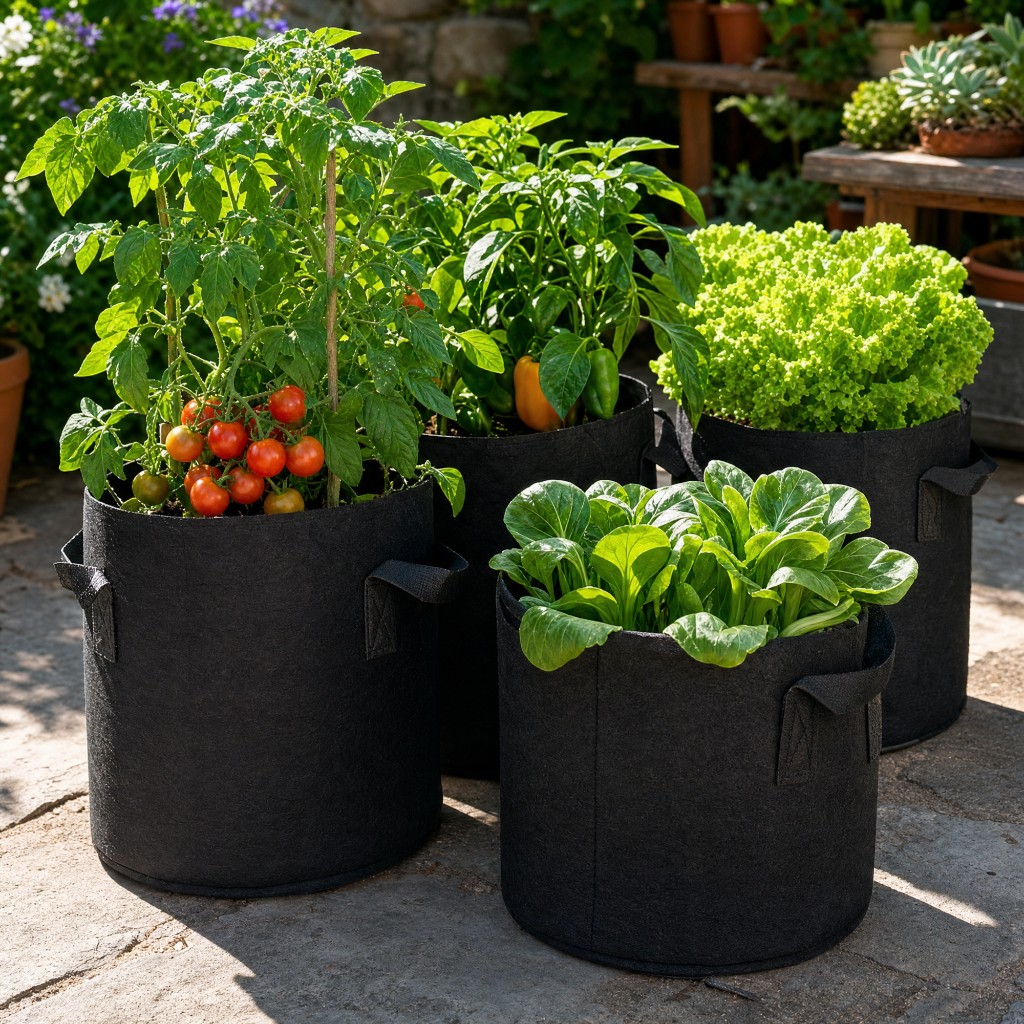
Fabric grow bags are the most affordable large “planters” available, and they’re not just for vegetables anymore. Modern felt-like fabric bags come in tan, gray, and green that look presentable on a porch.
Fabric bags “air prune” roots—when roots hit the breathable fabric, they stop circling and branch instead, creating a healthier root system than plastic or ceramic pots. They also prevent overwatering because excess moisture evaporates through the sides.
A 15-gallon fabric bag (equivalent to a 20-inch pot) costs $5–$8 and holds a large tomato plant, a small shrub, or a dramatic ornamental grass. The tradeoff: they dry out faster, so plan on watering more frequently.
Method 4: Hypertufa Planters ($10–$20)
Hypertufa is a lightweight faux-stone material made from Portland cement, peat moss, and perlite. It looks like aged limestone or old stone troughs.
Recipe: 1 part Portland cement, 1.5 parts peat moss, 1.5 parts perlite. Mix dry, then add water until the consistency resembles cottage cheese.
Steps:
- Use the same two-mold technique as concrete planters, or hand-form the mix over an inverted bowl draped with plastic wrap.
- Pack the mix 1.5–2 inches thick—hypertufa is lighter than concrete but weaker, so it needs thicker walls.
- Poke drainage holes with a stick before it sets.
- Cover with plastic and cure for 2 weeks, misting every few days.
- After curing, rough up the surface with a wire brush for a more natural stone look.
Hypertufa is about 1/3 the weight of concrete, making it practical for balconies and rooftop gardens. Over time, it naturally grows moss and lichen, enhancing the aged look.
Method 5: Upcycled Container Planters ($0–$10)

Almost any large waterproof container can become a planter with drainage holes drilled in the bottom:
- 5-gallon buckets: Free from bakeries and restaurants. Paint them, wrap them in rope, or slip them inside a decorative basket.
- Wine barrels: Half wine barrels hold 25+ gallons of soil. Source from vineyards ($15–$25) or garden centers ($40–$60).
- Old tires: Turn inside out for a scalloped edge, paint, and stack for height.
- Dresser drawers: Line with plastic sheeting, drill drainage, and fill with flowers. A stacked set becomes a planter shelf.
- Cinder blocks: Stack in a column or L-shape. The hollow cores hold small plants; the center fills with soil for larger ones.
Essential Tips for All DIY Planters
Regardless of method, every planter needs drainage holes—roots sitting in water rot within days. Use potting mix, not garden soil (it compacts in containers). Line porous materials (wood, hypertufa) with landscape fabric to slow moisture loss. And elevate planters off the ground with pot feet or small blocks to prevent water staining and improve drainage flow.