
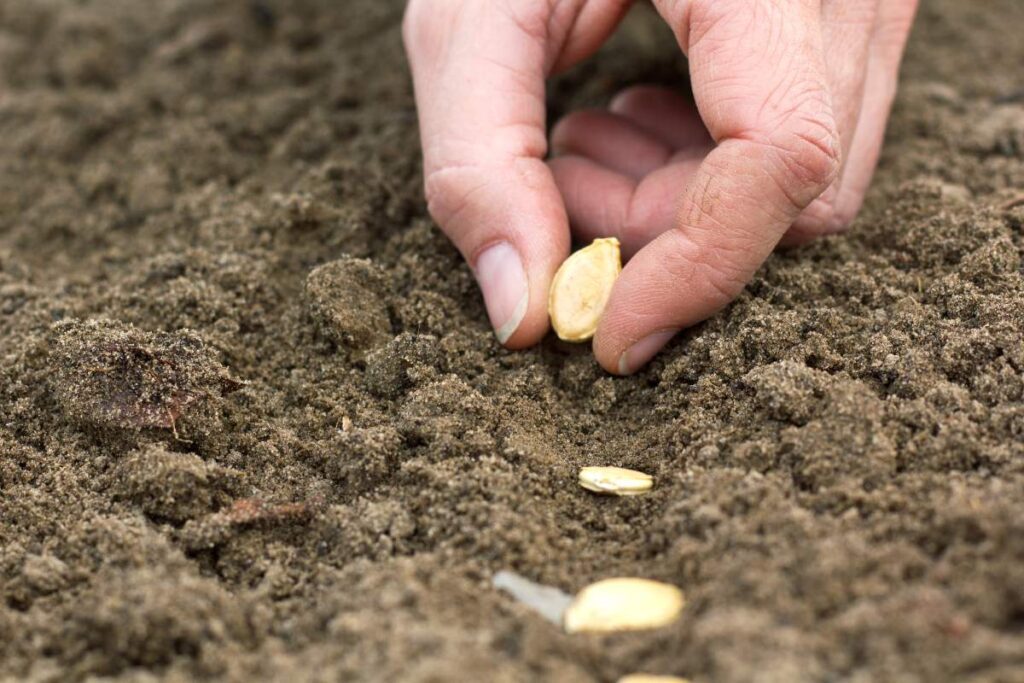
Yes, cracked seeds can germinate effectively by aiding water and oxygen absorption crucial for growth. Utilize scarification techniques like nicking or abrasion to enhance seed coat permeability. Soaking cracked seeds softens them for germination while enabling imbibition. Ensure optimal conditions like warmth and moisture for successful indoor germination. Consistent monitoring and care post-transplantation are vital for healthy seedling growth. Seed viability checks and gentle handling play key roles in the process. Remember, handling cracked seeds with care sets the stage for successful sprouting and plant development.
Understanding Cracked Seeds
To understand cracked seeds better, consider their crucial role in facilitating successful germination. The seed coat, or outer shell of a seed, plays a vital role in protecting the seed from external factors. However, a thick or hard seed coat can impede water and oxygen absorption, hindering germination. Cracked seeds, with their outer shell already compromised, allow for easier access to essential resources, increasing the chances of successful sprouting.
Genetics influence the thickness of seed coats, determining whether cracking is necessary for optimal germination. By inspecting cracked seeds, one can gauge their viability and predict their likelihood of germination. Soaking seeds before cracking can aid in softening tough seed coats, making it easier for the seedling to emerge.
When dealing with older seeds, cracking becomes even more beneficial as they tend to have harder shells that may inhibit germination. By understanding the significance of cracked seeds and the role of the seed coat, one can enhance their germination success rates.
Scarification Techniques
When scarifying seeds, you can opt for mechanical methods like nicking or sanding the seed coat to help water penetrate. This physical abrasion jumpstarts germination by breaking the seed’s dormancy. Remember to be gentle yet thorough to ensure the best results for your cracked seed germination process.
Seed Coat Removal
Utilizing various scarification techniques such as mechanical, thermal, freeze-thaw, and chemical methods can effectively remove seed coats to enhance the germination process. Seed coat removal is a crucial step in promoting successful germination, especially for seeds with hard exteriors that inhibit water absorption and seedling emergence. Here are some methods commonly used for seed coat removal:
- Mechanical Scarification: This technique involves physically roughing up or nicking the seed coat, facilitating water absorption and seedling emergence.
- Thermal Scarification: By using hot water to soften tough seed coats, thermal scarification promotes quicker germination in seeds with hard exteriors.
- Freeze-Thaw Scarification: Freezing seeds in ice cubes breaks dormancy, particularly beneficial for seeds requiring cold stratification before germination.
These scarification methods aid in breaking seed dormancy barriers, allowing water and oxygen to penetrate the seed coat and kickstart the germination process effectively.
Mechanical Scarification
Using a kitchen box grater or rough concrete surfaces, you can effectively implement mechanical scarification to aid in seed germination. This technique involves physically breaking or weakening the seed coat to allow moisture to penetrate and kickstart germination. Seeds such as nasturtium, bitter melon, and Zucker gourd greatly benefit from mechanical scarification due to their hard seed coats that can inhibit water absorption.
To perform mechanical scarification, gently rub the seeds against a kitchen box grater or a rough concrete surface. This abrasion creates small openings in the seed coat, promoting water intake and oxygen exchange essential for germination. After scarification, soak the seeds in water for about 8 hours to further facilitate the germination process.
Mechanical scarification is a practical and straightforward method to help seeds germinate successfully before transplanting them into your garden. By utilizing common household tools, you can enhance the germination rate of hard-coated seeds and ensure a healthy start for your plants.
Soaking Cracked Seeds
To soften the outer shell and facilitate germination, soaking cracked seeds is a beneficial technique that allows water to penetrate the seed coat. This process aids in the imbibition process, where the seed absorbs water, initiating germination. Here are some tips to help you with soaking seeds:
- Duration: The length of time you soak the seeds can vary depending on the seed type and the thickness of the shell. Typically, soaking overnight or for 12-24 hours is sufficient for most seeds.
- Benefits: Soaking can be especially helpful for older seeds with tougher shells. It can rejuvenate them by providing the moisture needed to kickstart germination.
- Precautions: Be cautious not to over-soak the seeds, as this can lead to mold or rotting. Monitor the seeds during soaking to ensure they do not stay submerged for too long.
Germinating Indoors
When germinating cracked seeds indoors, ensure they are viable by checking for signs of life. Maintain optimal conditions like warmth, moisture, and oxygen to support germination. Implement specific techniques tailored for cracked seeds to boost your chances of successful indoor germination.
Cracked Seed Viability
Inspecting cracked seeds before planting indoors is crucial to ensure their viability for successful germination. When dealing with cracked seeds, here are some key points to consider:
- Genetic Factors: The thickness of a seed’s outer shell is influenced by genetics. Some seeds naturally have thicker shells, making cracking necessary for germination.
- Cracking Techniques: Utilizing the right tools, like sandpaper or a razor blade, can help crack the seeds effectively without damaging the inner embryo. This step is vital to facilitate the germination process.
- Planting Environment: After cracking the seeds, it is essential to plant them in a suitable growing medium. Providing the cracked seeds with the proper environmental conditions, such as adequate moisture, warmth, and light, is crucial for optimal germination.
Indoor Germination Conditions
Maintain a consistent temperature of 70-85°F (21-29°C) for successful indoor seed germination. Room temperature is ideal for most seeds to sprout effectively. Providing a stable and warm environment encourages the seeds to germinate uniformly. Ensure your seeds receive adequate light exposure, whether from natural sunlight or artificial sources, to support the germination process. Light is crucial for seedlings to photosynthesize and grow healthily indoors.
Using a humidity dome or cover can help maintain high moisture levels, mimicking the conditions of a greenhouse, which is beneficial for indoor germination. Proper humidity promotes seed hydration and softening of the seed coat, aiding in the emergence of seedlings. Moreover, good air circulation is essential to prevent the growth of mold and mildew, which can hinder germination.
Maintaining a clean and pest-free germination environment is vital for the health of your seedlings indoors. Regularly inspecting and cleaning your germination space will help prevent any issues that could impede successful seed germination. By creating these optimal indoor conditions, you can increase the chances of successful seed germination and robust seedling growth.
Germination Success Tips
To achieve successful germination indoors, consider utilizing cracked seeds, as they have a higher likelihood of sprouting under the right conditions. Cracked seeds allow water to penetrate the shell, kickstarting the germination process effectively. Before planting, inspect cracked seeds for signs of viability to ensure a higher success rate. When germinating cracked seeds indoors, maintaining proper moisture levels and warmth is essential for optimal germination conditions. Here are some tips to help you germinate cracked seeds successfully:
- Seed Viability Check: Before planting cracked seeds, conduct a viability check to ensure they are in good condition for germination.
- Consistent Moisture: Maintain consistent moisture levels by misting the seeds regularly without overwatering to support the germination process.
- Warm Environment: Provide a warm environment for the cracked seeds to germinate by placing them in a sunny spot or using a heat mat to encourage sprouting.
Suitable Germination Environment
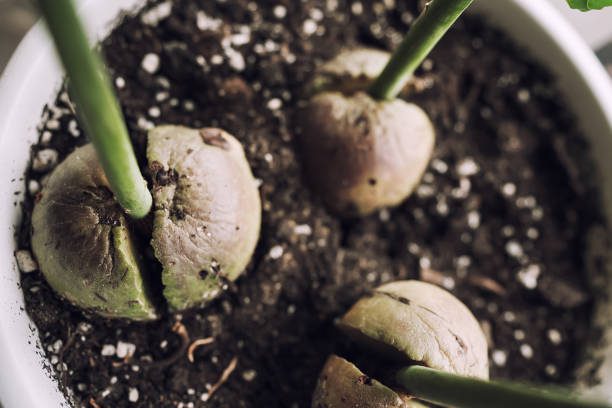
Creating an ideal environment for cracked seed germination involves ensuring warmth, moisture, and proper aeration to support successful sprouting. When setting up the germination environment, it is crucial to pay attention to details such as the orientation of the cracked seeds in the growing medium. Placing the seeds correctly can significantly impact the germination process by providing optimal conditions for growth. Additionally, cracked seeds benefit from being in darkness during the initial stages of germination as this stimulates root development. Consistency is key when it comes to temperature and humidity levels, as fluctuations can hinder the germination process. Adequate airflow around the cracked seeds is essential to prevent mold growth and ensure healthy sprouting. Here is a table summarizing key factors for creating a suitable germination environment for cracked seeds:
| Factors to Consider | Importance |
|---|---|
| Warmth | High |
| Moisture | High |
| Aeration | High |
| Orientation | Moderate |
Transplanting Cracked Seeds
When transplanting cracked seeds, handle them gently to protect the delicate sprout within. Position the cracked seed correctly in the planting medium to support the root’s unrestricted growth. Make sure to provide the ideal conditions of moisture, warmth, and light for the cracked seed to thrive post-transplantation.
Seed Viability After Cracking
Inspect cracked seeds for any signs of mold, rot, or damage before proceeding with transplanting to ensure the best chance of successful germination. Once you’ve confirmed the integrity of the cracked seeds, follow these steps for optimal results:
- Check the Embryo: Ensure the embryo inside the cracked seed is undamaged. Seeds with intact embryos have a higher chance of germination success.
- Maintain Post-Cracking Care: After cracking the seeds, provide the necessary conditions for germination, such as keeping the cracked seeds moist and warm. This care is crucial for the germination process.
- Prompt Transplanting: After cracking and inspecting the seeds, transplant them promptly into a suitable growing medium. This step is essential to give the cracked seeds the best environment for germination.
Transplanting Cracked Seedlings
Carefully transplanting cracked seedlings is crucial to ensure their successful establishment in a new growing environment. When transplanting cracked seedlings, it is essential to handle them gently to prevent further damage to their delicate roots. Select a suitable growing medium that offers ample support and nutrients for the transplanted seedlings. Water the seedlings after transplanting, ensuring a gentle watering to aid in their adjustment to the new surroundings. Place the transplanted seedlings in a location with adequate lighting and temperature conditions to promote optimal growth. Keep a close eye on the transplanted seedlings for any signs of stress or transplant shock, adjusting care as necessary to support their recovery.
| Transplanting Tips | Description |
|---|---|
| Handle with Care | Be gentle when handling cracked seedlings to avoid causing further harm to their fragile root systems. |
| Suitable Growing Medium | Choose a growing medium that provides the necessary support and nutrients for the transplanted seedlings. |
| Monitor for Stress | Keep a watchful eye on the transplanted seedlings for any signs of stress or transplant shock. |
Care for Cracked Seeds
Handle cracked seeds with utmost care when preparing for transplanting to ensure their successful adaptation to a new growing environment. When dealing with cracked seeds, remember that the seed coat plays a crucial role in protecting the seed and aiding in germination. Here are some essential tips for caring for cracked seeds during transplanting:
- Gentle Handling: Avoid further damaging the fragile seed coat by gently transferring cracked seeds to their new planting location.
- Proper Planting Depth: Ensure cracked seeds are planted at the correct depth and orientation to support successful germination and seedling growth.
- Optimal Growing Conditions: Provide cracked seeds with the necessary moisture, warmth, and aeration required for their development post-transplanting.
Importance of Proper Treatment
To maximize germination success rates, ensuring proper treatment of cracked seeds is crucial. When a seed is cracked, it gains easier access to essential resources like water and oxygen, expediting the germination process. Properly treating cracked seeds involves gentle handling to prevent further damage that could impede germination. This is especially important for seeds with thick shells or those that have aged, as cracking helps overcome their natural barriers to germination.
Water plays a vital role in seed germination, and cracked seeds are more adept at absorbing the moisture they need to sprout. By carefully examining cracked seeds for viability before planting, you can ensure that only healthy seeds are given the opportunity to grow. Remember, the treatment of cracked seeds sets the stage for successful germination, making it essential to handle them with care and provide the necessary conditions for growth.
Benefits of Scarification
Breaking through tough seed coats, scarification offers numerous benefits that enhance the germination process. Through this process, water absorption is improved, which is crucial for kickstarting the germination process of various seeds. Here are three key benefits of scarification:
- Enhanced Germination Rates: Seeds with hard shells, such as beans or morning glories, often struggle to absorb water effectively. Scarification helps these seeds break through their tough exterior, allowing water to penetrate and initiate germination more efficiently.
- Mimicking Natural Processes: Scarification mimics the natural processes that some seeds undergo in the wild, like passing through an animal’s digestive system. By breaking down the seed coat, scarification helps replicate these natural mechanisms, promoting successful germination.
- Speeding Up Germination: For seeds with built-in dormancy mechanisms, scarification can speed up the germination process significantly. By facilitating water and nutrient absorption, scarification ensures that the seed can germinate more rapidly and successfully.
Common Cracked Seed Types
Several common cracked seed types, including nasturtium, bitter melon, and Zucker gourd, benefit from scarification techniques to aid in successful germination. These seeds have tough outer shells that can inhibit germination. By cracking or nicking the outer shell of these seeds, you can help them absorb water more easily and kickstart the germination process. Scarification techniques such as mechanical methods like gently filing the seed coat, thermal methods involving exposure to heat, or freeze-thaw cycles can be employed to break through the hard shell. Once scarified, these seeds should be soaked in water before being germinated indoors under controlled conditions for optimal results. Nasturtium, bitter melon, and Zucker gourd seeds are known for their resilience, and with the right scarification techniques, you can improve their chances of successful germination and ensure a healthy start for your plants.
Tips for Successful Germination
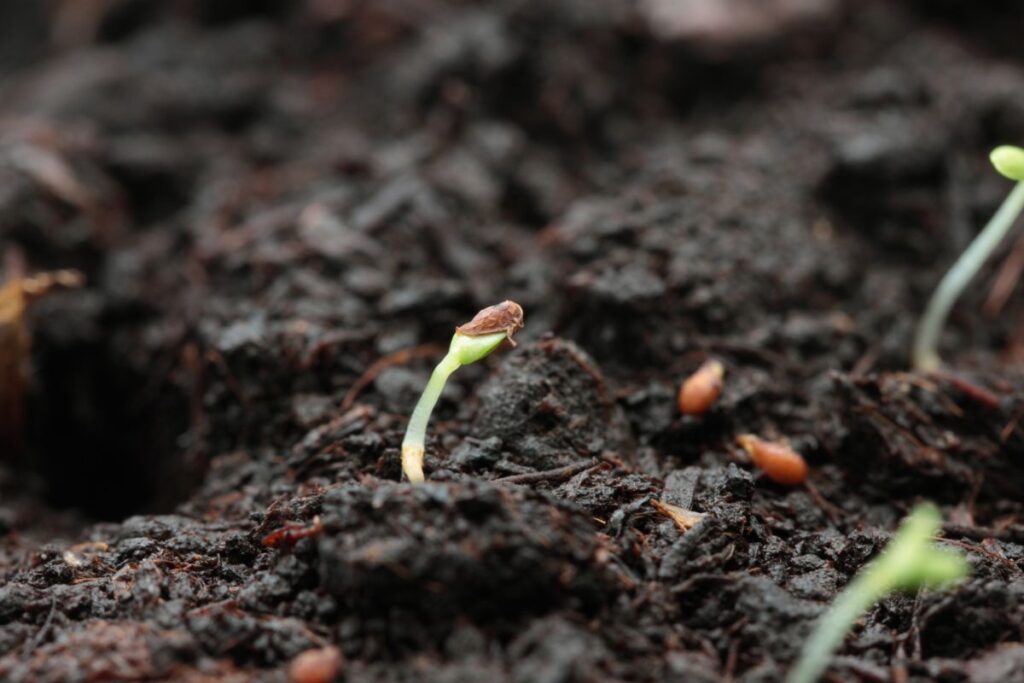
Inspecting cracked seeds after scarification can provide valuable insights into their viability for successful germination. When aiming for optimal germination rates, consider the following tips:
- Proper Moisture Levels: Ensure that the soil or germination medium is adequately moist but not waterlogged. The right balance is crucial for the seeds to germinate effectively.
- Consistent Temperature: Maintain a stable temperature range suitable for the specific plant species. Fluctuations can hamper germination or cause poor seedling development.
- Patience and Observation: Germination times vary depending on the plant type. Some seeds may sprout quickly, while others require more time. Regularly check on your seeds, noting any changes or signs of germination. Be patient and give them the time they need to grow.
Tricks for Enhancing Growth
To enhance the growth of your cracked seeds, consider enriching the soil with nutrient-rich amendments to provide essential nourishment. Ensure your seeds receive an adequate amount of sunlight exposure, as this is crucial for their photosynthesis and overall development. By implementing these tricks, you can give your cracked seeds the best chance to thrive and grow into healthy plants.
Nutrient-Rich Soil Amendments
Enhance the growth of your plants by incorporating nutrient-rich soil amendments such as compost, worm castings, and aged manure into your gardening routine. These amendments play a crucial role in providing essential nutrients and improving soil quality for optimal plant development. Here are some key points to consider:
- Improved Soil Fertility: Nutrient-rich soil amendments like compost and aged manure boost the fertility of the soil, providing plants with the necessary nutrients for healthy growth.
- Enhanced Soil Structure: Adding organic matter through worm castings and compost helps improve soil structure, promoting better water retention and nutrient availability for plants.
- Balanced Nutrient Uptake: Soil amendments not only supply essential nutrients like nitrogen, phosphorus, and potassium but also aid in balancing soil pH with additives such as lime or sulfur, ensuring optimal nutrient uptake by plants.
Adequate Sunlight Exposure
For optimal growth of your plants, ensuring they receive adequate sunlight exposure is crucial for their overall health and development. Sunlight plays a vital role in promoting healthy growth by providing the energy needed for photosynthesis, a process where plants convert light into energy. Insufficient sunlight can result in stunted growth, pale leaves, and weak stems, ultimately hindering the plant’s development.
Most plants thrive when exposed to direct sunlight for 6-8 hours a day. However, factors like plant type and climate can influence sunlight requirements. It’s essential to understand the specific needs of your plants to ensure they receive the right amount of sunlight to support their growth.
In cases where natural sunlight is limited, indoor plants may benefit from supplemental grow lights. These artificial lights mimic natural sunlight and provide the necessary light spectrum for photosynthesis, helping plants thrive even in indoor environments. By prioritizing adequate sunlight exposure, you can enhance the growth and overall health of your plants.
Troubleshooting Cracked Seeds
When dealing with cracked seeds, meticulous examination is crucial to determine their viability for successful germination. Here are some troubleshooting tips to help you assess cracked seeds before attempting germination:
- Inspect for Damage: Carefully examine cracked seeds for any visible signs of damage, such as broken or missing parts. If the inner embryo is compromised, the seed may not germinate successfully.
- Check for Rot: Look closely for any indications of rot on the cracked seed. If you notice any signs of decay, it is best to discard the seed to prevent issues during the germination process.
- Crack Carefully: If cracking seeds is necessary due to thick or hard outer shells, do so with caution to avoid damaging the delicate inner embryo. A clean, precise crack can improve water absorption and increase the chances of successful germination.
Seedling Care
To ensure optimal growth, seedling care necessitates meticulous attention to water, light, and temperature conditions. When tending to your seedlings, it’s crucial to avoid overwatering, as excess moisture can lead to root rot and other issues. Keep a close eye on your seedlings for any signs of nutrient deficiencies or pest infestations that could hinder their development. Gradually acclimate your seedlings to direct sunlight to prevent sunburn, ensuring they receive the right amount of light for healthy growth.
The choice of a suitable growing medium is also vital for seedling care. Opt for a well-draining mix that provides adequate aeration and moisture retention for the roots. When transplanting your seedlings, handle them with care to avoid damaging their delicate roots. By maintaining a vigilant approach to watering, providing appropriate light exposure, monitoring for any problems, and selecting the right growing medium, you can set your seedlings up for success in their early stages of life.
Harvesting From Cracked Seeds
When it comes to harvesting from cracked seeds, it is crucial to inspect them carefully for any signs of rot or mold before proceeding with the germination process. Cracked seeds can still germinate successfully if not damaged during the cracking process. Here are key points to consider:
- Visual Inspection: Examine cracked seeds for any indications of decay or fungal growth. Discard any seeds showing these signs to prevent contamination during germination.
- Moisture and Air Penetration: Cracking seeds allows moisture and air to reach the embryo inside, aiding in the germination process. Ensure cracked seeds are kept in a suitable environment with adequate humidity and ventilation.
- Additional Assistance: Some cracked seeds might benefit from scarification or soaking to further enhance germination potential. Implement these methods as needed to improve the chances of successful sprouting.