

To repot your plant safely and easily, start by choosing the right time – late winter or early spring is best. Select a pot slightly larger with drainage holes. Ensure proper airflow with materials like terra cotta. Use a mix with peat moss and perlite for roots. Make sure the pot has rocks at the bottom for drainage. Loosen roots gently before trimming and placing in new soil. Water lightly afterward and monitor for stress signs. Provide indirect sunlight for healthy growth. These steps will keep your plant thriving and happy.
Choosing the Right Time
Choose the late winter or early spring for repotting your plants for optimal results. This time frame aligns with the plant’s natural growth cycle, allowing it to recover quickly and thrive in its new environment. Repotting during late winter or early spring gives your plant the best chance for optimal growth throughout the upcoming growing season.
When deciding if your plant needs repotting, look for signs such as leaf drop, slow growth, or roots protruding from the drainage holes. These are indicators that the plant may be root-bound and in need of a new, larger pot with fresh soil. Young plants benefit from more frequent repotting, typically every 6 months to a year, to ensure they have enough space for healthy root development. On the other hand, older plants can go longer between repottings, usually every few years, to refresh the soil and provide new nutrients for sustained growth. By choosing the right time to repot your plant, you set the stage for its continued health and vitality.
Selecting a Proper Pot
When repotting your plants, consider selecting a pot that provides ample room for root growth and promotes proper drainage. Choose a pot that is 1-2 inches larger in diameter than the current pot to ensure your plants have enough space for their roots to expand comfortably. Opt for pots with drainage holes to prevent waterlogging, which can lead to root rot. Materials like terra cotta or ceramic are excellent choices as they allow for optimal airflow to the roots, aiding in healthy growth. When selecting a potting mix, look for one that includes coarse-fibered peat moss and perlite to provide adequate aeration and drainage for the plant’s roots. Additionally, consider adding nutrient-rich additives like worm castings to boost the overall health and growth of your plants. By carefully considering these factors, you can ensure that your plants thrive in their new potting environment.
Ensuring Proper Drainage
To ensure proper drainage for your plants during repotting, using pots with drainage holes is essential. Without adequate drainage, water accumulation can occur, leading to root rot and soil compaction, which can suffocate plant roots. Proper drainage is crucial as it allows for oxygen flow to the roots, promoting healthy growth. One practical tip to enhance drainage is to place rocks or pebbles at the bottom of the pot before adding soil. This helps prevent waterlogging by creating space for excess water to drain away from the roots. Remember, the goal is to ensure that water can freely flow out of the pot, preventing the roots from sitting in water for extended periods, which can be detrimental to the plant’s health. By utilizing pots with drainage holes and incorporating these drainage techniques, you can create an optimal environment for your plants to thrive during repotting.
Preparing the Plant for Repotting
To prepare your plant for repotting, begin by gathering all the necessary tools. Carefully loosen the root ball to avoid damaging the plant’s delicate root system. Trim any damaged roots to promote healthy growth once the plant is in its new pot.
Gather Necessary Tools
Ensure you have all the necessary tools ready before beginning the process of repotting your plant to set yourself up for success. Here are the essential items you’ll need:
- New Pot: Select a new pot that is 1-2 inches larger in diameter than the current one to provide ample space for your plant’s growth.
- Drainage Holes: Opt for a pot with drainage holes to prevent waterlogging and root rot, ensuring proper drainage for the plant.
- Fresh Potting Mix: Have a high-quality potting mix ready that is rich in nutrients and fertilizers to support your plant’s health and growth.
Having these tools prepared will make the repotting process smoother and more efficient. Don’t forget to wear gloves for protection and lay down a potting tarp to make cleanup easier. Additionally, consider preparing a nutrient solution for a plant bath to help soften the roots and loosen the old potting mix, making it easier to transition your plant to its new home.
Loosen Root Ball Gently
Before starting to repot your plant, gently loosening the root ball is a crucial step in preparing the plant for a successful transition to its new pot. Loosening the root ball gently helps prevent damage and shock to the plant during repotting. Carefully separate the roots, avoiding yanking or pulling, to prevent tearing or harming the plant. This process allows for better nutrient absorption and promotes healthy growth by stimulating new root growth in the fresh potting mix. Take your time and work slowly to ensure the roots are adequately loosened before transferring the plant to its new pot. By handling the root ball gently, you set the stage for a smoother repotting process and give your plant the best chance to thrive in its new environment. Remember, a healthy root system is the foundation for a healthy plant.
Trim Damaged Roots
When preparing your plant for repotting, the first step involves carefully trimming any damaged roots using clean and sharp scissors or pruning shears. Here’s how to trim damaged roots effectively:
- Identify Unhealthy Roots: Inspect the root system and look for roots that are discolored, mushy, or have a foul odor. These are signs of root damage that need to be removed.
- Gentle Trimming Technique: Trim the damaged roots by making clean cuts close to the root base. Ensure the cuts are smooth to prevent tearing, which can lead to further stress on the plant.
- Promote Healthy Development: By trimming damaged roots, you encourage the plant to focus its energy on growing new, healthy roots. This process aids in preventing root rot and allows for optimal nutrient absorption for the plant’s overall well-being.
Placing the Plant in New Soil
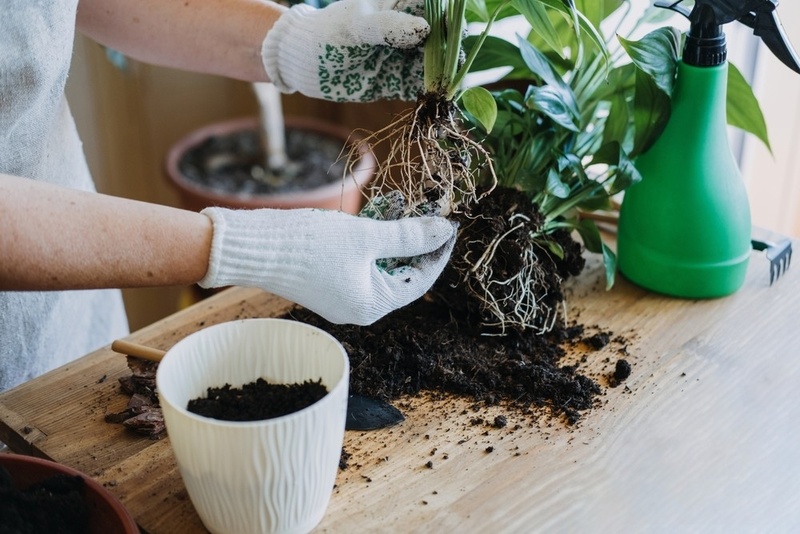
Centering the plant in the new pot is essential to promote even growth and development. When repotting your plant, ensure the roots are well spread out in the fresh soil. Gently pack the soil around the roots, providing stability without burying the plant too deep. This prevents suffocation and encourages healthy growth. Remember to leave a small gap between the soil surface and the pot rim. This space allows for watering without overflow, preventing waterlogging, which can harm the roots. After placing the plant in the new soil, lightly press down on the soil to eliminate any air pockets. These pockets can hinder root growth and stability. By following these steps, you give your plant the best chance to thrive in its new environment.
Watering After Repotting
After repotting your plant, be mindful of how you water it. Lightly water the plant to prevent root stress and overwatering. Before watering, ensure the soil isn’t waterlogged by checking its moisture levels.
Proper Watering Techniques
Wondering how to properly water your plant after repotting to ensure its health and growth? Following the repotting process, watering your plant correctly is crucial for its well-being. Here are some expert tips to help you master the proper watering techniques:
- Light Watering Post-Repotting: After repotting your plant, give it a light watering to help the new soil settle in its new home. This initial watering aids in the transition process and provides some moisture to the plant without overwhelming it.
- Avoid Overwatering: Overwatering your plant after repotting can be detrimental, leading to issues like root rot and increased stress for the plant. Check the soil’s moisture level before watering and ensure it’s necessary to prevent waterlogging.
- Room Temperature Water: When watering your repotted plant, opt for room temperature water. Using water at a moderate temperature helps prevent shocking the plant’s roots and supports its recovery and growth process. Remember to allow the soil to slightly dry out between waterings to encourage healthy root development.
Monitoring Soil Moisture
To ensure your plant’s health and growth post-repotting, closely monitor the soil moisture by checking the dampness about an inch deep with your finger. After repotting, the new potting mix may have different water retention properties than the old one, affecting how often you need to water your plant. Water your plant lightly initially to help it adjust to the new environment without risking overwatering. It’s crucial to water based on the plant’s specific needs and the moisture level of the soil rather than following a strict schedule. Pay close attention to the top of the soil and the roots; they will give you clues about when to water. Ensure the new pot has proper drainage to prevent waterlogging, which could harm the plant’s roots. Monitoring soil moisture is essential in the first few weeks after repotting to ensure the plant is adapting well to the new pot and potting mix.
Monitoring for Stress Signs
Check your plant regularly for yellowing or wilting leaves, as these are common stress signs to monitor after repotting. Monitoring for stress signs is crucial to ensure your plant’s health and recovery post-repotting. Here are some key indicators to watch for:
- Leaf Drop: Keep an eye out for any sudden leaf drop after repotting, as this can be a sign of stress or root damage. If you notice excessive leaf shedding, it may indicate that your plant is struggling to adjust to its new environment.
- Lack of New Growth: A lack of new growth or stunted growth can be an indication that your plant is under stress. New growth is a positive sign that your plant is recovering well from the repotting process. If you don’t see any new leaves or shoots appearing, your plant might need extra care.
- Root Damage: Look for signs of root damage such as mushy or discolored roots when checking your plant post-repotting. Root damage can impede your plant’s ability to uptake nutrients and water, leading to stress symptoms like wilting or yellowing leaves. If you suspect root damage, consider repotting your plant with more care to promote recovery.
Providing Indirect Sunlight
Indirect sunlight plays a vital role in maintaining the health and well-being of your plants by preventing sunburn and minimizing the risk of heat stress. Plants such as ferns, peace lilies, and snake plants thrive under indirect sunlight as it allows them to photosynthesize efficiently without the risk of damage from harsh rays. To provide indirect sunlight, place your plants near a window with sheer curtains or use a sheer curtain to filter the sunlight. Direct sunlight can cause leaves to burn or wilt, emphasizing the importance of positioning your plants where they receive gentle, filtered light. By ensuring your plants receive the right amount of indirect sunlight, you create an optimal environment for them to flourish and grow healthily. Remember, proper exposure to indirect sunlight is key to the overall well-being and longevity of your indoor plants.