

To care for bellflowers, start by planting them in a sunny to partly shaded spot with well-drained, loamy soil. Ensure they get at least 6 hours of direct sunlight daily. Incorporate organic matter to boost soil fertility and maintain a pH between 6 and 7. Water them deeply but infrequently, allowing the soil to dry slightly between waterings, and mulch around the plants to retain moisture. Fertilize with a balanced 10-10-10 formula in early spring. Regularly dividing the plants prevents overcrowding and promotes vigor. Protect them in winter with adequate mulching. These specifics set a strong foundation for thriving bellflowers, and there’s plenty more to explore for optimal care.
1. Selecting the Right Location
To ensure optimal growth, choose a sunny to partially shaded area with well-drained, slightly acidic to neutral loamy soil for your bellflowers. Selecting the right location isn’t just about picking a spot; it’s about understanding the micro-environment your bellflowers will thrive in. Full sun encourages robust growth and abundant flowering, but in hotter climates, partial shade during the afternoon can prevent scorching.
The soil’s drainage capacity is paramount. Bellflowers won’t tolerate standing water, which can lead to root rot. Ensure the planting site facilitates quick water runoff, especially after heavy rains. You might consider a raised bed if natural soil drainage is inadequate.
Factor in air circulation when selecting your location. Good airflow helps prevent the onset of fungal diseases, which bellflowers can be prone to in humid or overcrowded conditions. Avoid planting too close to walls or other barriers that might restrict air movement.
Lastly, remember the mature size of the bellflower variety you’ve chosen. Provide enough space for the plant to reach its full height and spread without competing for resources. This foresight will prevent overcrowding and reduce competition for nutrients and light, key elements for the health and vibrancy of your bellflowers.
2. Soil Preparation and Ph
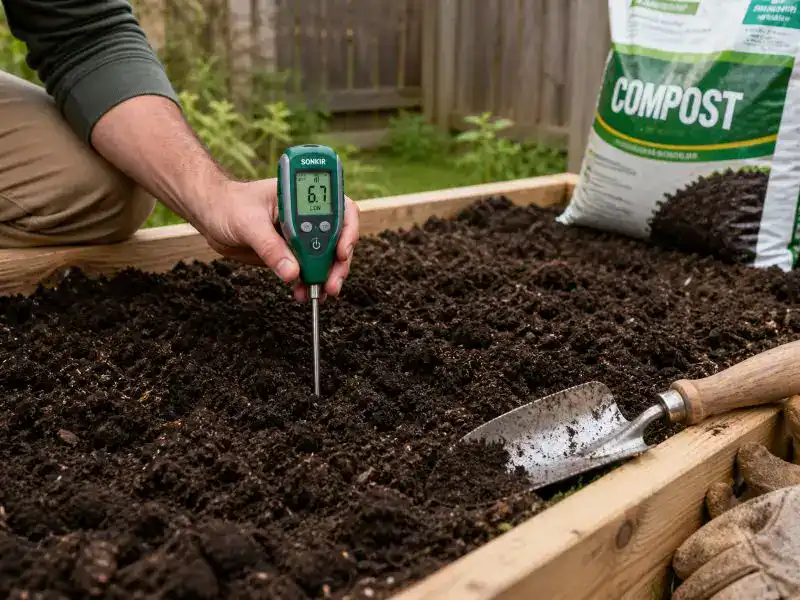
Before planting your bellflowers, it’s crucial to properly prepare the soil by ensuring it is well-drained, loamy, and has a pH between 6 and 7. This pH range is ideal as it strikes a balance between being slightly acidic to neutral, promoting optimal nutrient availability crucial for robust root development and overall plant health.
To achieve well-drained loamy soil, you’ll need to incorporate organic matter such as compost or aged manure, which also helps in maintaining the pH within the desired range. Remember, the right soil prep not only supports strong root systems but also enhances your bellflowers’ blooming potential.
| Factor | Importance for Bellflowers |
|---|---|
| Well-drained Loamy Soil | Ensures proper drainage and air circulation |
| pH 6 to 7 | Maximizes nutrient uptake and root health |
| Organic Matter | Enhances soil structure and fertility |
| Nutrient Availability | Essential for growth and flower development |
| Root Development | Critical for absorption and stability |
3. Watering Requirements

After preparing your soil as described, you’ll need to focus on the watering requirements to ensure your bellflowers flourish. Bellflowers thrive in consistently moist soil, which means you’ll have to develop a balanced watering regimen. It’s essential to water these plants deeply but infrequently, allowing the water to penetrate the soil thoroughly. This method encourages the roots to grow deeper, making the plants more resilient and drought-tolerant.
Watering early in the day is advisable as it allows the foliage to dry before the cooler evening temperatures set in, significantly reducing the risk of fungal diseases. Always aim to keep the soil moist, but be cautious of overwatering. Soggy conditions can lead to yellowish-brown leaves, a sign of distress in bellflowers.
To aid in retaining soil moisture and reducing the frequency of your watering sessions, consider mulching around your plants. A good layer of organic mulch can conserve water, suppress weeds, and keep root temperatures stable.
4. Fertilizing Techniques
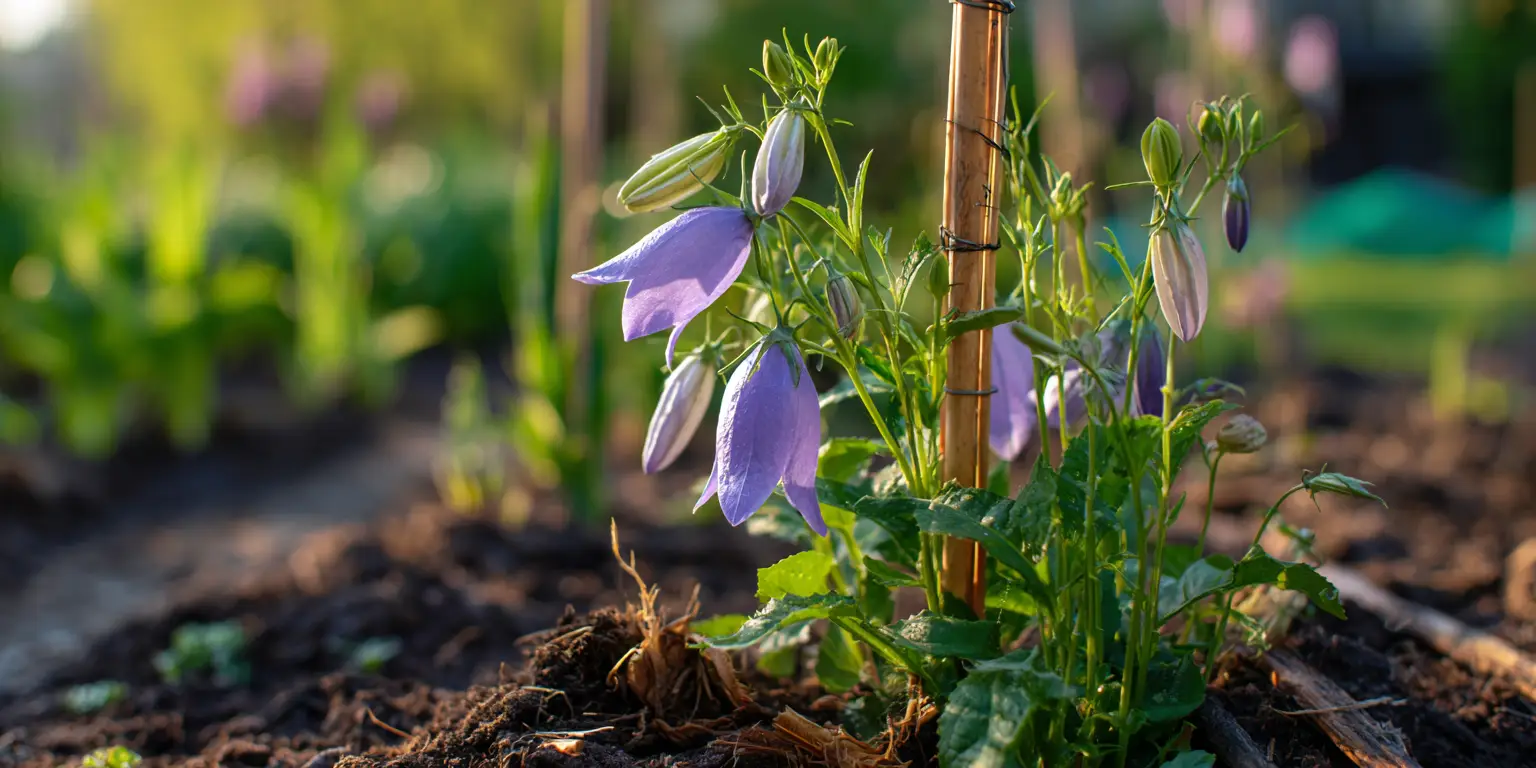
You’ll achieve the best results by applying a balanced 10-10-10 fertilizer to your bellflowers in early spring, fostering robust growth and vibrant blooms. This specific type of fertilizer provides an equal ratio of nitrogen, phosphorus, and potassium, essential nutrients that support the overall health and flowering of your plants.
When fertilizing, it’s crucial to be sparing. Over-application can lead to nutrient burn, which may damage or even kill your bellflowers. Aim for a light sprinkling around the base of the plant, carefully integrating it into the soil to avoid direct contact with the leaves and stems.
As summer approaches, consider mulching around your bellflowers. Mulch helps in retaining moisture, which is vital during the warmer months, and keeps the roots cool, providing a stable environment for sustained growth. A layer of organic mulch can also gradually break down, adding nutrients back into the soil.
Avoid the temptation to fertilize in late fall or winter. Bellflowers need to enter dormancy without the spur of new growth, which can be detrimental due to the cold.
If you prefer a less frequent fertilizing schedule, opt for a slow-release fertilizer. This type ensures a steady supply of nutrients over time, reducing the risk of overfeeding and promoting a healthful bloom cycle.
5. Managing Sunlight Exposure

To ensure your bellflowers flourish, it’s essential to manage their exposure to sunlight meticulously.
You’ll need to identify the ideal conditions to prevent sunburn, especially during peak intensity hours.
Understanding the timing and intensity of sunlight exposure is key to promoting vigorous growth and abundant flowering in your bellflowers.
Ideal Sunlight Conditions
For optimal growth and flowering, bellflowers should be placed in full sun to light shade. Campanula, commonly known as bellflowers, thrive under specific light conditions that significantly influence their health and blooming capabilities. Full sun exposure is essential as it directly impacts the robustness of the foliage and the vibrancy of the flowers. When bellflowers receive at least six hours of direct sunlight daily, you’ll notice an increase in flower production, leading to a more vibrant display.
However, while full sun is ideal, some varieties of bellflowers also perform well in light shade, especially in regions with very intense sunlight. This slight moderation can prevent the foliage from fading and maintain the plant’s overall vitality. It’s crucial to observe your bellflowers’ response to their lighting conditions. If you notice signs of diminished flowering or pale leaves, it may indicate a need for more sunlight.
Consistency in sunlight exposure throughout the day also plays a pivotal role in keeping bellflowers healthy. Ensure they’re positioned to benefit from the sun’s track from morning till afternoon. Adapting the placement of your bellflowers, whether in garden beds or containers, will help maximize their growth potential and floral output.
Avoiding Sunburn Risk
While bellflowers benefit from ample sunlight, managing their exposure is crucial to prevent sunburn, especially during peak sunlight hours. You’ll find that bellflowers thrive best when they receive full sun to light shade. However, too much direct sunlight can lead to sunburn, which you’ll notice as wilting and browning on the leaves.
To shield your bellflowers from excessive sun, consider providing light shade during the hottest parts of the day. This doesn’t mean relocating your plants but rather using strategic placement like under a sheer cloth or near taller plants that can offer intermittent shade. Monitoring the leaves for signs of stress, such as changes in color or texture, is a good practice. These symptoms suggest that your bellflowers might be receiving too much sun and are beginning to suffer from burn.
Positioning is everything. Set up your bellflower plants where they can bask in the morning sun but are protected from the harsher afternoon rays. This balance is key to avoiding sunburn while promoting healthy growth.
Sunlight Timing Importance
Understanding how to manage the timing of sunlight exposure enhances the growth and health of your bellflowers by ensuring they receive beneficial morning light and protective afternoon shade. By carefully balancing their exposure to full sun and partial shade, you can optimize their photosynthesis while minimizing stress, which is crucial for maintaining vibrant blooms and robust health.
Here’s how you can effectively manage sunlight timing for your bellflowers:
- Morning Sunlight Exposure:
- Aim for at least 6 hours of direct morning sunlight. This early light is less intense, aiding in photosynthesis and helping to dry morning dew, which reduces the risk of fungal diseases. Morning sunlight also stimulates efficient water uptake and plant metabolism.
2. Afternoon Shade Provision:
- Provide partial shade during the afternoon when the sun is at its peak. This prevents excessive heat exposure that can stress bellflowers, leading to wilting or sunburn. Afternoon shade helps regulate the internal temperature of the plant, preserving moisture and protecting the delicate tissues.
3. Regular Monitoring:
- Consistently observe your bellflowers’ response to sunlight exposure. Adjust their location or shading methods based on their growth patterns and bloom cycles. This ensures they always receive the optimal amount of sunlight and shade for their specific needs.
6. Mulching and Root Care

To optimize your bellflower’s health, selecting the right type of mulch is crucial. Organic materials such as shredded leaves or bark chips not only insulate the soil to protect the roots but also improve moisture retention and suppress weed growth.
When applying mulch, ensure you spread a 2-3 inch layer around the plants, keeping it at least 1-2 inches away from the stem to prevent moisture-related diseases.
Ideal Mulch Types
Selecting the right type of mulch is crucial for optimizing the health and growth of your bellflowers. Mulching with organic materials not only conserves water but also maintains even soil temperatures, which are essential for the delicate bellflower roots. However, the choice of material and proper application are key to prevent issues such as rot and fungal diseases.
Here are three ideal mulch types for bellflowers:
- Compost: Rich in nutrients, compost acts as a dual-purpose mulch providing both soil enrichment and moisture retention. Apply a 2-4 inch layer, ensuring that you leave a small gap around the stems to prevent moisture-related diseases.
- Shredded Leaves: These are particularly good at retaining moisture and suppressing weeds, which compete with bellflowers for nutrients. They also break down over time, adding organic matter to the soil and improving its structure.
- Straw: Straw helps in keeping the soil cool and moist during hot weather. It’s lighter than many other mulches, reducing the risk of smothering the plants or promoting rot if not piled up against the stems.
Each type of mulch helps in maintaining an optimal soil environment, crucial for the health and vibrancy of your bellflowers. Regular replenishment of the mulch layer will sustain its benefits, ensuring your bellflowers thrive.
Root Protection Techniques
While mulching effectively conserves water and regulates soil temperature, it’s equally important to apply it correctly to protect the delicate roots of your bellflowers. You should ensure that the mulch is placed 1-2 inches away from the plant crown. This prevents moisture buildup around the stem, which can lead to root rot and disease.
Mulching shields the roots from extreme temperature fluctuations and harsh weather conditions, maintaining a stable environment for root development. It’s crucial to select the right organic materials, such as compost or bark chips, which not only suppress weeds but also enrich the soil as they decompose. These materials offer nutrient benefits that are essential for the thriving of your bellflowers.
In addition to mulching, proper root care involves managing soil moisture to avoid overwatering. Consistent, yet moderate watering promotes deep root growth, enhancing plant stability and resilience. Remember, deep roots anchor the plant more effectively and help in accessing water from deeper layers, especially during dry spells.
7. Pruning and Deadheading
After your bellflowers bloom, pruning and deadheading are essential to encourage new growth and more vibrant displays. Here’s how you can effectively manage these tasks:
- Pruning for Health and Shape
- Immediately after the blooms fade, prune your bellflowers to remove any yellowing or damaged foliage. This not only cleans up the appearance of your plant but also prevents potential diseases from taking hold. Additionally, cutting back tall or leggy stems can promote a denser, bushier growth, enhancing the overall vigor of the plant.
2. Deadheading to Encourage Blooming
- Regularly remove spent flowers before they set seeds. By cutting back these old blooms, you redirect the plant’s energy from seed production back into creating more robust and continuous flowers. This practice not only prolongs the flowering period but also improves the aesthetic appeal of your garden.
3. Maintaining Overall Plant Health
- Throughout the growing season, continue to monitor and remove any unhealthy stems or leaves. This proactive approach ensures that resources are maximized for the development of new blooms and robust foliage, maintaining the health and beauty of your bellflowers.
8. Monitoring for Pests
Regularly monitoring your bellflowers for pests, such as aphids and slugs, is crucial to maintain their health and vitality. Aphids are particularly notorious for distorting growth and causing yellowing leaves. These pests suck sap from your plants, weakening them and making them more susceptible to other diseases. To effectively control aphids, apply insecticidal soap, which targets these pests without harming your plants or beneficial insects.
Additionally, be vigilant for slime trails and ragged holes in the foliage, indicators of slug predation. Slugs can cause significant damage overnight, especially in moist conditions. Implement barriers or organic slug baits to mitigate their impact.
Furthermore, you should also monitor for signs of rust and rot diseases. These issues can advance quickly, particularly in humid or overly wet conditions. Rust diseases present as orange or yellowish spots on leaves, while rot usually affects the stems or roots, leading to a general decline in plant health.
Ensure you’re examining your bellflowers regularly, ideally weekly, for any signs of these pests or diseases. Early detection is key to managing these problems efficiently. By keeping a close watch and promptly addressing issues, you’ll keep your bellflowers thriving.

9. Dividing Bellflower Plants
To ensure your bellflower plants maintain vigor and don’t overcrowd, it’s essential to divide them every 2-5 years.
Timing is crucial; aim for spring or fall when the plants are dormant to minimize stress and promote rapid recovery.
When dividing, use a sharp knife or spade to cleanly separate the clumps, ensuring each new section has ample roots and shoots for successful re-establishment.
Best Time to Divide
Dividing bellflower plants every 2-5 years, ideally in early spring or fall, ensures optimal health and vigorous growth. This practice is crucial to rejuvenate growth, prevent overcrowding, and maintain the overall health of your plants.
Choosing the right time to divide is key, as it allows bellflowers to recover and establish themselves during mild weather, avoiding the stress of extreme temperatures.
Here are the key reasons to time your division correctly:
- Rejuvenate Growth: Dividing in early spring, just as the plants start to show signs of new growth, or in the fall, when they begin to go dormant, gives your bellflowers a chance to establish roots in cooler temperatures. This timing supports vigorous growth and prepares the plants for a robust blooming season.
- Prevent Overcrowding: Crowded plants compete for nutrients, light, and space. Dividing them during these optimal seasons helps ensure that each section has adequate resources to thrive, enhancing overall plant vigor and bloom quality.
- Enhance Plant Health: Regular division helps maintain vitality by promoting better air circulation around the plants. This reduces the risk of fungal diseases and pest infestations, which are more prevalent in crowded conditions.
Dividing Techniques Explained
Now that you understand the importance of timing in dividing bellflower plants, let’s explore the specific techniques to ensure successful propagation.
You’ll need to divide your bellflower plants every 2-5 years to keep them healthy and prevent overcrowding. This periodic division stimulates vigorous growth and revitalizes your garden.
Firstly, choose a day with cooler weather, preferably cloudy or in early evening, to minimize the stress on the plants. Using a sharp knife or spade, gently lift the entire plant out of the ground, ensuring you keep a substantial amount of roots intact. Carefully examine the root ball and identify natural divisions. Each section should have a good amount of roots and several shoots for optimal growth.
Next, use your sharp knife to cut the plant into smaller sections. Make clean cuts to avoid damaging the roots further. Once divided, replant the sections promptly at the same soil depth as the original plant. This consistency helps the bellflower adapt quickly to its new environment.
10. Seasonal Overwintering Tips
As winter approaches, you should mulch around your bellflowers to shield their roots from the harsh cold. This crucial step in late fall prepares your plants for freezing temperatures and provides necessary winter insulation.
Avoid heavy pruning during this season; cutting back too much can spur tender new growth that’s vulnerable to frost damage. Instead, focus on removing dead foliage, which also helps in preventing diseases and pests from carrying over to spring.
To ensure the health of your bellflowers during the colder months, follow these detailed steps:
- Ensure Adequate Drainage: Bellflowers thrive in well-drained soil, especially during winter. Poor drainage can lead to waterlogging, which increases the risk of root rot. Amend the soil with organic matter to improve its structure and drainage capabilities.
- Apply a Protective Layer: Cover the soil around your bellflowers with a thick layer of mulch, such as straw or leaves. This layer acts as a blanket, protecting the plants from severe cold and minimizing the impact of frost heaving.
- Monitor Moisture Levels: While it’s crucial to keep the soil from drying out completely, overwatering in winter can be just as detrimental. Check the soil moisture regularly and water sparingly to prevent saturation and root issues.
These steps will help your bellflowers survive and thrive through the winter, ensuring a robust return in spring.