

To start sowing seeds successfully, begin indoors to ensure a healthy head start for your plants. Take advantage of early sowing benefits, follow seed packet guidelines, and protect your seedlings from frost. Understand the last frost dates in your area and use various covering options. Pay attention to proper seed planting steps, consider heating mats and humidity domes, and provide adequate lighting for optimal growth. Through these essential steps, you’ll set the foundation for a flourishing garden.
Benefits of Starting Seeds Indoors

Discover the numerous advantages of starting seeds indoors to kickstart your gardening journey with success and satisfaction. By beginning your plants from seeds indoors, you ensure they get a healthy head start. The controlled environment allows for optimal conditions that result in stronger, more robust plants compared to store-bought transplants.
Additionally, starting seeds indoors opens up a world of possibilities with a wide variety of seed choices that may not be available at local nurseries. This diversity not only adds excitement to your garden but also introduces unique flavors and characteristics to your harvest.
Moreover, starting seeds indoors is a cost-effective approach to gardening. It saves you money in the long run, as purchasing seeds is often more economical than buying individual plants. You can produce a larger quantity of plants at a fraction of the cost, making your gardening endeavors more budget-friendly.
Early Sowing Advantages
Starting seeds indoors for early sowing provides a significant advantage by jumpstarting your gardening season, particularly beneficial for warm-season vegetables. By giving your plants a head start, you ensure optimal growth and development, setting the stage for a bountiful harvest.
Early sowing allows for a longer growing season, which can be crucial for certain crops that require extended periods to mature fully. Moreover, starting seeds indoors provides you with the opportunity to choose from a wider range of seed varieties, enhancing the diversity in your garden.
However, it’s essential to remember that early sowing requires careful attention to detail. Timely seed sowing is critical for successful plant development, as missing the optimal window can lead to weak seedlings or even FOMO (fear of missing out) on the best growing conditions.
Seed Packet Guidelines
When you hold a seed packet in your hands, you’re not just holding seeds; you’re holding a wealth of information crucial for successful gardening.
The details on those packets are like a roadmap, guiding you on the journey from sowing to harvest.
Embrace the knowledge within those packets, for they hold the key to unlocking your garden’s full potential.
Seed Packet Information
Utilize the valuable information provided on seed packets to ensure successful seed sowing and plant growth in your garden. Seed packets are treasure troves of essential details. They inform you about the ideal planting depth, spacing requirements, and germination time for each type of seed.
By carefully reading these instructions, you can determine the best time to start sowing seeds, whether indoors or outdoors. Pay close attention to any guidance related to the last frost date in your region, as this will help you plan your planting schedule effectively.
The information on seed packets serves as a roadmap, guiding you on whether seeds should be started indoors for later transplantation or directly sown in your garden. Following these guidelines meticulously guarantees that you sow your seeds at the right time, optimizing the chances of successful germination and healthy plant development.
Trust in the wisdom encapsulated within the seed packets, and watch your garden flourish.
Seed Storage Tips

Harness the wealth of information found on seed packets to ensure optimal seed storage and preserve seed viability for successful planting and growth in your garden.
Proper seed storage is crucial for maintaining the shelf life and viability of your seeds. To make the most out of your seed storage, follow these guidelines:
- Check Expiration Dates: Always check the seed packets for expiration dates to ensure you’re planting viable seeds.
- Follow Specific Storage Recommendations: Different seeds have unique storage conditions, so adhere to the specific guidelines provided on the seed packet.
- Keep Seeds in Cool, Dark, and Dry Place: Store your seeds in a cool, dark, and dry place to prevent premature aging and maintain their quality.
- Avoid Moisture, Heat, and Sunlight: Protect your seeds from moisture, heat, and sunlight to preserve their viability for future planting seasons.
Frost Protection Measures
You must prioritize understanding frost protection measures to shield your delicate plants from the harsh effects of cold weather. Knowing the last frost dates in your area is essential to plan ahead and provide adequate protection.
Embrace tools like frost blankets, row covers, or protective structures to safeguard your plants and nurture their growth.
Frost Cloth Benefits
Frost cloth offers invaluable protection to plants by creating a warm shield that shields them from frost damage. When you use frost cloth in your garden, you aren’t just protecting your plants; you’re nurturing them with care and dedication.
Here are some reasons why frost cloth is a must-have for any gardener:
- Peace of Mind: Knowing that your plants are safe under the warm embrace of frost cloth can bring you a sense of calm during frosty nights.
- Extended Growing Season: By shielding your plants from late spring frosts, frost cloth allows you to enjoy a longer growing season and reap the rewards of your hard work.
- Affordable Protection: With its cost-effective nature, frost cloth provides an accessible solution to safeguard your delicate plants without breaking the bank.
- Easy Application: The lightweight and easy-to-use design of frost cloth make it a hassle-free option for protecting your garden from the harsh effects of cold weather.
Embrace the power of frost cloth and watch your garden thrive even in the face of unpredictable weather conditions.
Seasonal Covering Options
Utilize various seasonal covering options such as frost blankets, row covers, and cloches to provide essential protection for your seedlings against frost damage. These measures are crucial to safeguard your plants and extend the growing season by offering warmth and insulation to young seedlings.
Frost blankets act as a protective shield, while still allowing light, air, and moisture to reach your plants. Row covers, made of lightweight fabric, provide an extra layer of defense against cold temperatures, ensuring your seedlings thrive in adverse conditions. Cloches, on the other hand, create a mini greenhouse effect around individual plants, making them ideal for tender seedlings susceptible to frost damage.
Last Frost Dates Knowledge
Understanding the significance of last frost dates is essential for successful seedling transplantation and optimal growth in your garden. Knowing when to expect the last frost in your area ensures that you can transplant your seedlings at the right time, giving them the best chance to thrive.
Here are some key points to consider:
- Utilize USDA Hardiness Zones: These zones provide valuable information about the average date of the last frost in your specific region, guiding your planting schedule accurately.
- Prevent Cold Damage: By transplanting your seedlings after the last frost date, you protect them from potential harm caused by sudden cold snaps.
- Consult Almanac’s Planting Calendar: This resource offers detailed and reliable information on last frost dates, enabling you to plan your gardening activities effectively.
- Optimal Timing for Transplantation: Understanding the last frost dates ensures that you transplant your seedlings at the perfect time for their growth and development.
Seeds Not Suitable for Indoors
When starting your seedlings indoors, it’s crucial to be aware of which crops aren’t suitable for this method to ensure successful growth in your garden. Corn, cucumbers, pumpkins, and squash fall into this category. These plants have delicate root systems that make transplanting them from indoors to outdoors tricky, often resulting in poor growth and potential failure.
Carrots are another crop best suited for direct sowing in the soil. This method helps prevent issues like bolting and ensures a thriving harvest.
For crops like pumpkins and squash, which require ample space for root development, starting them indoors can limit their growth potential. It’s essential to provide these plants with the necessary room to spread their roots for optimal development.
Additionally, certain crops, such as corn and cucumbers, thrive better when directly sown outdoors due to their sensitivity to root disturbance. By understanding which crops aren’t suitable for indoor sowing, you can set your garden up for success and maximize your harvest.
Undercover Seed Sowing Tips
When sowing seeds undercover, timing is crucial for successful germination.
Knowing the ideal seed depth and proper watering techniques are essential for nurturing healthy seedlings.
Mastering these tips will set the foundation for a thriving indoor garden.
Timing for Sowing

For successful undercover seed sowing, precise timing is crucial to ensure optimal germination and strong seedling growth. When starting your seeds indoors or in a protected environment, the timing sets the foundation for a successful growing season. Here are some key points to consider when determining the right time to sow your seeds:
- Seeds: Choosing high-quality seeds is the first step towards a bountiful harvest.
- Soil: Ensure your seed starting mix is well-draining and sterile to provide the best environment for seed germination.
- Start: Begin sowing seeds according to the specific requirements of each plant variety for the best results.
- Seedlings: Monitor your seedlings closely for any signs of issues such as legginess or diseases to address them promptly.
Ideal Seed Depth
To achieve successful undercover seed sowing, understanding the ideal seed depth is essential for promoting robust germination and healthy seedling growth. The depth at which you sow your seeds can significantly impact their development.
Small seeds, such as those of lettuce or basil, thrive when sown at shallow depths. These fine seeds require minimal soil coverage to sprout successfully.
On the other hand, larger seeds like beans or peas may need to be buried deeper in the soil to establish strong root systems for optimal growth.
Ensuring you plant seeds at the proper depth, as indicated on seed packets or through online resources, is crucial for proper germination and subsequent seedling development. By following these guidelines and catering to the specific depth requirements of different seed types, you set the stage for healthy and thriving plants in your garden.
Watering After Sowing
Gently water your seeds after sowing undercover to ensure proper moisture levels without disrupting the soil or seed placement. When it comes to watering after sowing, precision is key. Using a fine mist spray bottle or a narrow-spouted watering can allows you to provide just the right amount of water without causing soil disturbance.
Remember, finding the balance in soil moisture is crucial; let the soil dry slightly between waterings to prevent seed rot and overwatering issues. Proper watering practices are fundamental for successful seed germination and healthy seedling development in undercover sowing environments.
Monitor the soil moisture diligently to safeguard your seeds against drying out or becoming waterlogged. Your attention to watering detail will be rewarded with strong, thriving seedlings ready to flourish.
Seed Prep and Labeling
Prepare your seeds by soaking hard-shelled varieties overnight to facilitate germination and ensure successful seed starting. Once your seeds are ready, it’s crucial to label your seed trays using a permanent marker. Include the seed variety and sowing date on each label.
Proper labeling is key for tracking seedling progress and ensuring the right care for different plant types. By labeling your seeds accurately, you can avoid confusion and effectively organize your seed starting trays. Remember, seed prep and labeling are fundamental steps in the seed starting process, aiding in the identification of your plants as they grow.
Moistening Soil Technique
Ensure optimal germination and healthy seedling growth by moistening the soil before sowing your seeds. Properly moistened soil creates a welcoming environment for seed growth and root development, setting the stage for successful germination.
Here are some key points to consider when moistening the soil:
- Even Distribution: Moistening the soil beforehand helps achieve uniform moisture levels across the planting area, facilitating consistent germination.
- Optimal Germination: Adequately moistened soil provides the necessary hydration for seeds to sprout effectively, enhancing the germination process.
- Root Development: By ensuring the soil is adequately moist, you encourage robust root development, which is crucial for the long-term health of your plants.
- Seed Growth: Properly moistened soil supports the initial growth stages of seeds, giving them the best chance to thrive and develop into healthy seedlings.
Soil Tray Preparation
To kickstart your soil tray preparation, focus on selecting trays that offer adequate space for your seeds to grow.
Mix your soil with care, ensuring it’s well-draining and nutrient-rich to support healthy seedling development.
Tray Selection Tips
Why is selecting the right tray crucial for successful seed sowing and healthy plant growth?
Choosing the appropriate tray can significantly impact your gardening success. Here are some key tips to consider:
- Drainage Holes: Opt for trays with proper drainage holes to prevent waterlogging, ensuring your plants’ roots stay healthy and disease-free.
- Reusable Trays: Consider using biodegradable or reusable trays to promote sustainability in your gardening practices, reducing waste and environmental impact.
- Sterilized Trays: Always clean and sterilize your trays before use to prevent the spread of diseases that could harm your seedlings.
- Transplanting Ease: Select trays that allow for easy transplanting, as this will help minimize root damage and ensure successful growth as your plants mature.
Soil Mix Preparation
For successful seed sowing and healthy plant growth, it is essential to prepare a soil mix that promotes optimal germination and provides a healthy environment for your seedlings. When preparing your soil mix, consider using a soil-less seed germinating mix to prevent soil-borne diseases and ensure healthy seedling growth. Make sure to use clean pots with good drainage to prevent waterlogging, which can lead to root rot in your delicate seedlings.
To help you visualize the importance of soil mix preparation, here’s a table outlining key factors to consider:
| Soil Mix Preparation Tips |
|---|
| Use soil-less seed germinating mix |
| Ensure clean pots with good drainage |
| Provide bright artificial light for seedlings |
Effective Soil Tamping
Properly compacting the soil post-seeding is crucial for establishing strong seed-to-soil contact and promoting successful germination. When you take the time to tamp the soil effectively, you’re setting the stage for healthy seedling root development and minimizing the risk of transplant shock. Here are some key reasons why soil tamping is essential:
- Enhanced Germination: By ensuring good seed-to-soil contact, tamping helps kickstart the germination process, leading to quicker and more uniform sprouting.
- Root Support: Tamping aids in creating a stable environment for seedling roots to establish themselves firmly in the soil, setting them up for robust growth.
- Moisture Retention: Properly compacted soil retains moisture better, providing the ideal conditions for seeds to germinate and seedlings to thrive.
- Reduced Transplant Shock: Well-tamped soil helps ease the transition for seedlings when they’re eventually transplanted, reducing stress and promoting healthier growth overall.
Proper Seed Planting Steps
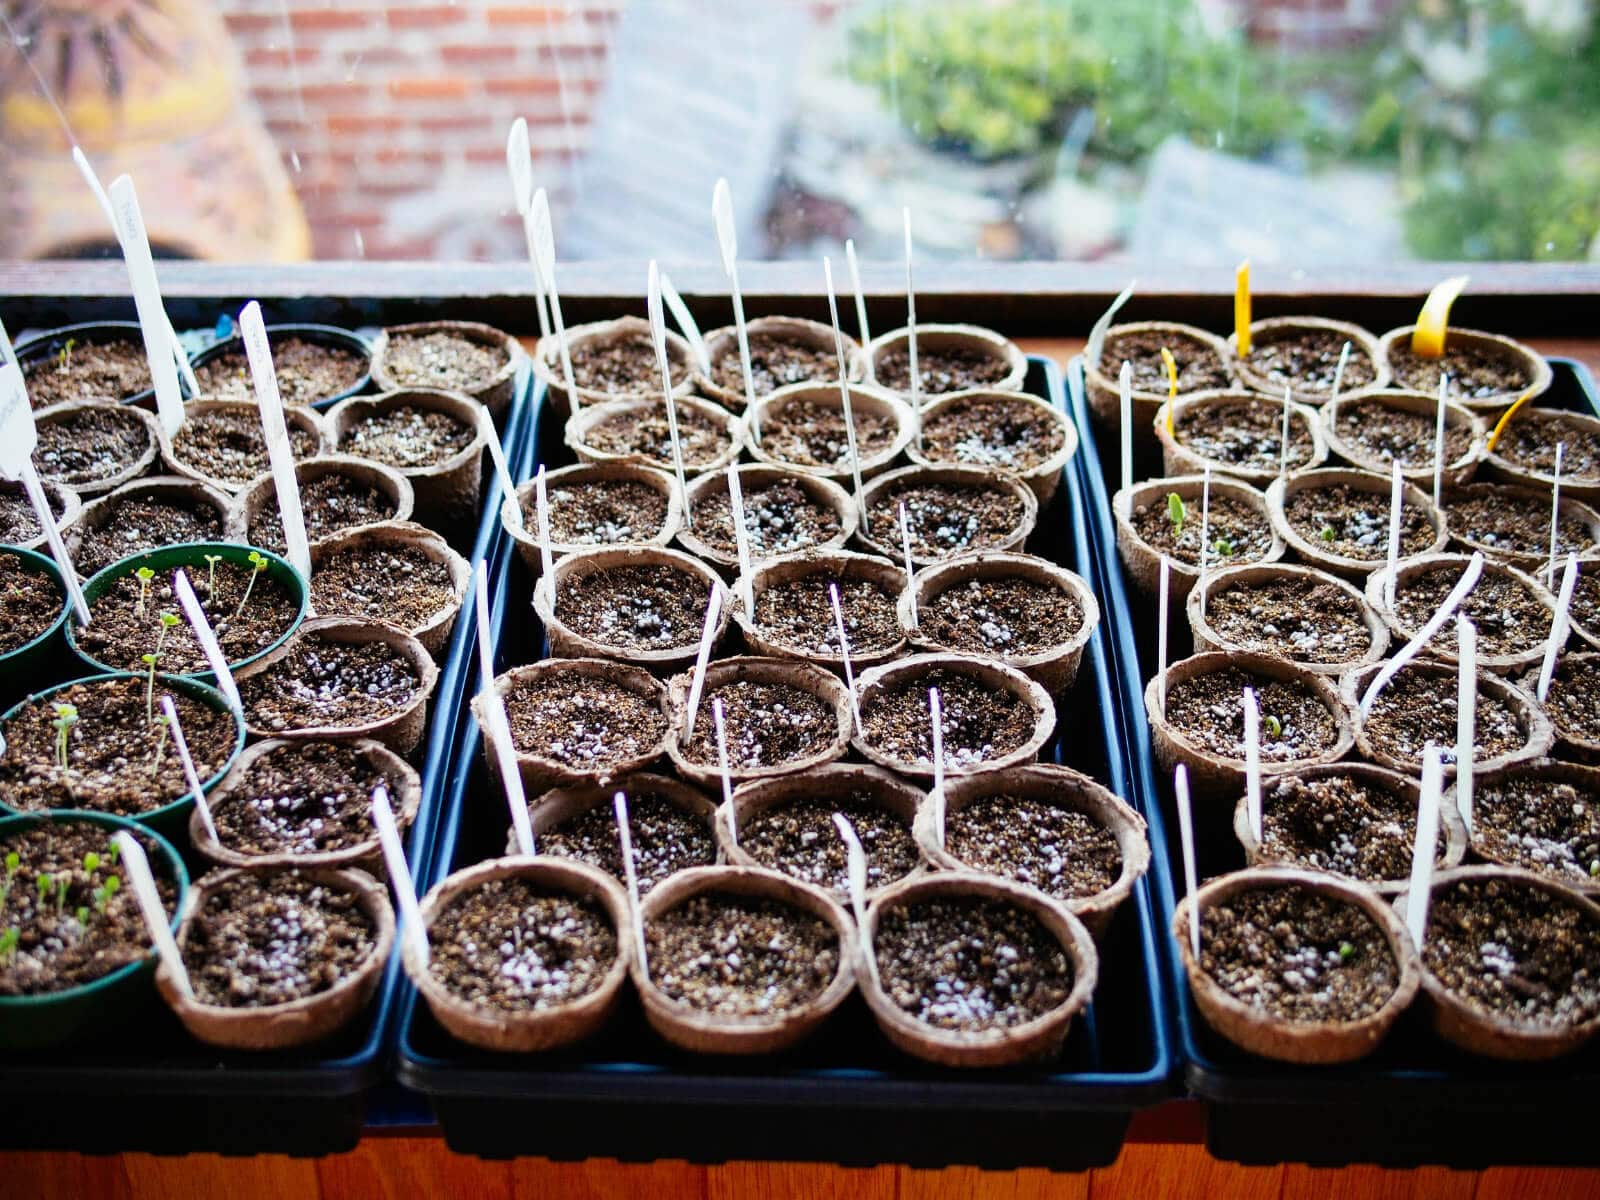
Prepare your seeds for planting by prepping them alongside markers, organizing them efficiently, and ensuring the soil is adequately moistened beforehand. When planting, use high-quality potting soil or seed starting mix. Tamp the soil to the proper density to support healthy seedling growth. Plant your seeds at the correct depth, ensuring good soil contact to promote optimal germination and root development. Remember, maintaining adequate soil moisture, ensuring the right soil temperature, and providing sufficient lighting are crucial factors for successful seed planting.
Label your seedlings for effective tracking and organization. This step allows you to monitor their progress closely, making it easier to adjust care as needed.
By following these proper seed planting steps, you set the stage for robust seedling growth and development.
Heating Mat Consideration
Consider utilizing heating mats to provide consistent warmth and enhance germination for your heat-loving plants. Heating mats play a crucial role in maintaining optimal soil temperatures for seed germination, ensuring faster and more uniform sprouting.
Here are some compelling reasons to incorporate heating mats into your seed starting process:
- Accelerated Germination: Heating mats can speed up the germination process, giving your seeds a head start towards becoming healthy seedlings.
- Improved Seedling Health: By providing a warm and cozy environment, heating mats contribute to stronger and more robust seedlings, setting them up for success.
- Enhanced Seed Starting: Especially in cooler environments or during the early stages of seed starting, heating mats offer the extra warmth needed for successful germination.
- Uniform Growth: With consistent warmth from heating mats, your seeds are more likely to sprout uniformly, leading to a more even and thriving garden.
Incorporating heating mats in your seed sowing journey can make a significant difference in the overall health and success of your plants.
Humidity Dome Usage
Utilize a humidity dome to create an ideal environment that promotes optimal seed germination through consistent moisture retention. Humidity domes play a crucial role in creating a controlled environment that aids in successful seed germination, particularly for tropical plant seeds that require high humidity levels. By using a humidity dome, you can ensure that the moisture needed for seed germination is retained, leading to faster and more successful seedling growth.
To further emphasize the benefits of humidity domes in seed germination, consider the following table:
| Benefits of Using a Humidity Dome |
|---|
| Creates a controlled environment |
| Promotes optimal seed germination |
| Retains consistent moisture levels |
| Ideal for tropical plant seeds |
| Reduces the risk of overwatering |
Incorporating a humidity dome not only maintains the necessary humidity levels but also reduces the frequency of watering, minimizing the chances of overwatering your delicate seedlings. For even better results, consider combining the humidity dome with a heating mat to enhance seed germination rates.
Adequate Lighting Importance
Ensuring proper lighting is essential for the healthy growth of your seedlings, providing the energy necessary for photosynthesis and promoting robust development. When it comes to seedling growth, light intensity plays a pivotal role in determining their overall health and vigor.
Here are some key points to consider:
- Grow lights: Utilizing grow lights can be a game-changer in supplementing natural light and ensuring your seedlings receive the required light intensity for optimal growth.
- Healthy development: Adequate lighting fosters healthy development by promoting strong stems, vibrant leaves, and overall robustness in your seedlings.
- Supplemental lighting: In cases where natural light is insufficient, supplemental lighting with grow lights becomes indispensable for maintaining the growth trajectory of your seedlings.
- Optimal light duration: Providing your seedlings with 14-16 hours of bright light daily mimics ideal sunlight conditions, setting the stage for successful transplanting and thriving outdoor growth.
Conclusion
Now that you have all the knowledge and tools necessary to start sowing seeds, it’s time to get your hands dirty and watch your garden flourish.
Starting seeds indoors provides a head start for your plants, ensuring a bountiful harvest. Remember to follow the guidelines on your seed packets, protect against frost, and provide the right conditions for germination.
With dedication and proper care, your seeds will soon grow into strong, healthy plants ready to be transplanted outdoors.
Happy sowing!