
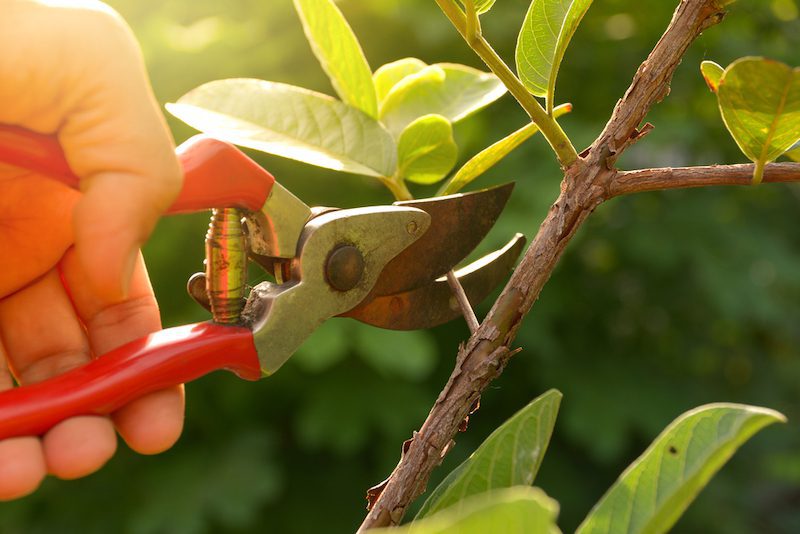
To use pruning shears effectively, first choose the right type—bypass pruners for live wood and anvil pruners for dead stems. Ensure your shears are sharp, using a fine file or whetstone, and clean with soapy water. Disinfect blades using isopropyl alcohol to prevent disease spread. When cutting, position the shears at a 45-degree angle to the stem, slightly above the bud or branch intersection. Grip firmly with both hands, applying steady pressure to make a clean cut. After use, clean and lubricate the shears to keep them in good condition. Mastering these techniques will enhance your gardening efficiency and plant health.
Selecting the Right Shears
When choosing the right pruning shears, you must first consider the specific task at hand; select bypass pruners for precise cuts on live wood and anvil pruners for tougher, dead stems. Bypass pruners, often lauded as the best pruning option for their ability to make clean, close cuts, are essential for promoting healthy plant growth. The scissor-like action of bypass pruners allows the sharp, curved blade to slice past a thicker, unsharpened hook, ensuring minimal damage to your plants’ delicate tissues.
As you look for the perfect hand pruners, consider the ergonomics of the tool. Hand fatigue can become a significant issue with extensive pruning tasks, so it’s crucial to choose pruners that fit well in your hand. The EnduroPRO shears are particularly well-suited for those with medium to large hands, providing a comfortable grip that enhances control and reduces strain during prolonged use.
Moreover, opting for pruners with a vertically inclined cutting head can significantly ease the strain on your hands and wrists. This orientation aligns more naturally with the hand’s movements, thereby enhancing cutting efficiency while minimizing the physical effort required. Such features are instrumental in executing prolonged pruning sessions without undue stress.
Preparing Your Shears
Before you begin your pruning tasks, ensure your shears are sharp, clean, and disinfected to facilitate optimal performance and plant health. Keeping your garden shears in top condition is crucial to making clean cuts that help prevent disease transmission and promote quicker healing of your plants.
To prepare your shears properly, follow these steps:
- Sharpen the Blades: A sharp blade is essential for making precise cuts. Use a fine file or whetstone, holding the tool at the correct angle to restore a keen edge. Bypass pruners, which are best for cutting live wood, should have a smooth, sharp blade to avoid crushing delicate stems.
- Clean the Blades: After sharpening, make sure to clean any debris and sap off the blades. Use soapy water and a stiff brush to scrub them clean, then dry thoroughly to prevent rust.
- Disinfect the Shears: Wipe the blades with a cloth soaked in isopropyl alcohol or a 10% bleach solution. This step is vital to kill any pathogens that could spread disease among your plants.
Always lubricate the shears after cleaning to protect them from corrosion and ensure smooth operation. This routine maintenance will keep your garden shears ready for efficient and effective use each time.
Proper Handling Techniques
As you handle pruning shears, it’s crucial to master the grip and hand position; ensure your fingers envelop the handles with your thumb securely against the lock.
When making cuts, always aim for an optimal angle—typically 45 degrees to the branch—to enhance the cutting efficiency and minimize plant damage.
Grip and Hand Position
Grasp the pruning shears with the base of your hand and fingers to maximize control and precision during cutting tasks. When you grip the handles, ensure that your hand is positioned comfortably with the fingers wrapped securely but not too tightly. This allows for better maneuverability and less fatigue, especially during extensive pruning sessions.
Proper hand positioning is crucial not only for comfort but also for the accuracy of your cuts. Here are some key aspects to keep in mind:
- Align your thumb and forefinger around the top part of the handles for stability.
- Distribute pressure evenly across your palm to avoid localized strain.
- Adjust your grip based on the thickness of the branch and the type of cut required.
Choosing the right pruning shears also plays a significant role. Opt for models with ergonomic handles that suit your hand size. Products like the EnduroPRO shears are designed for medium to large hands and feature contours that naturally fit the palm, reducing stress and enhancing grip stability.

Cutting Angle Insights
To ensure a clean cut that promotes healthy plant growth, position your pruning shears at a slight angle relative to the stem or branch. This method, while seemingly minor in adjustment, plays a critical role in the plant’s recovery and continued health.
When you angle the blade of your hand pruners, aim for about a quarter-inch for hardwoods, which are more resilient, and a more generous half-inch angle for softer woods or perennial stems. This specific cutting angle facilitates a swift, sharp cut that doesn’t crush the plant tissues.
Moreover, cutting at this angle prevents water from accumulating on the cut surface, significantly reducing the risk of fungal infections or other diseases.
It’s crucial, however, to avoid slicing too close to any buds or nodes. Such proximity can stress the plant, potentially leading to die-back or stunted growth, which ultimately undermines the health and aesthetics of your garden.
Safety Precautions
Ensure you wear protective gloves and safety goggles when handling pruning shears to prevent potential injuries. It’s crucial to understand the mechanics and safety precautions associated with these tools to maintain both your garden and personal well-being.
Firstly, always grip the handles of your pruners using the base of your hand and fingers. This approach provides better control and stability, reducing the likelihood of slips that could lead to cuts or scrapes. Verify the position of the thumb lock before beginning your pruning tasks. This lock is pivotal for your safety and the proper function of the shears.
For effective and safe usage, follow these steps:
- Check the Thumb Lock: Ensure the thumb lock is turned counter-clockwise before you start to release the shears and make them ready for use.
- Squeeze Handles Firmly: Once unlocked, squeeze the handles tightly to ensure a firm grip. This prevents the shears from slipping during use.
- Handle with Care: Always be mindful of the blade’s direction and ensure the shears are pointed away from your body to minimize risk.
Identifying the Cut Site
Before making any cuts, carefully identify the precise location on the plant where the cut will be most beneficial. Using your pruning shears for a precise cut requires keen observation and a clear understanding of plant biology. To start, you’ll need to identify a healthy bud or lateral shoot. This is vital as you’ll make your cut just above this point. The goal here is to encourage the plant to direct its energy into growing these healthy parts, fostering vigorous new growth.
When identifying the cut site, don’t just focus on the bud; also consider the overall structure and health of the plant. Avoid cutting too close to the main stem, as this can cause damage or lead to die-back, which could weaken or kill parts of the plant.
The cut should ideally be made at a slight angle, sloping away from the bud, to facilitate water runoff and prevent disease entry.
Making the Cut
Positioning the blade of your pruning shears just right, make a precise cut above the selected bud to promote healthy plant growth.
Carefully grasp the hand shears, ensuring that your grip is firm but not overly tight, to maintain control and precision.
When targeting dead wood or unwanted branches, it’s crucial to make cuts that are clean and direct, minimizing harm to the surrounding live tissue. This helps the plant recover more quickly and prevents the spread of disease.
To make the most of your pruning efforts, consider these three key points:
- Accuracy: Position the blade exactly where the cut should be made, typically just above a bud or branching point. This precision prevents unnecessary damage and encourages proper regrowth.
- Cleanliness: Use shears that are sharp and clean. Dull or dirty blades can cause jagged cuts that are more susceptible to infection and decay.
- Technique: Depending on the branch’s orientation, you might find flipping your shears upside down beneficial. This prevents the anvil from crushing the part of the branch that remains on the plant, promoting healthier growth post-pruning.
Angle and Positioning
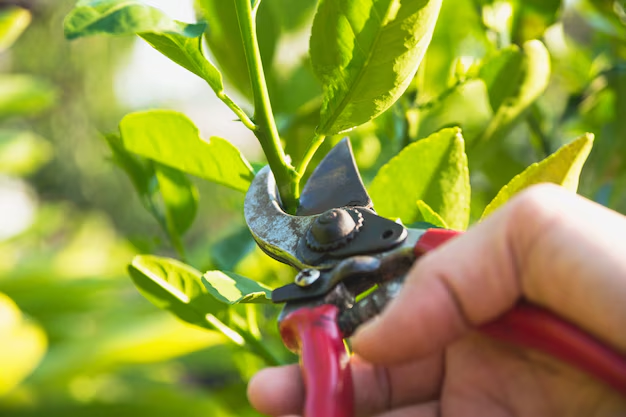
Adjusting the angle and positioning of your pruning shears is key to achieving a clean and precise cut that fosters optimal plant health. Position the blades at a slight angle relative to the stem or branch you’re targeting. This technique directs the cutting force in a way that cleanly severs the plant material without crushing it, which is crucial for the plant’s quick recovery and continued growth.
Ensure that the blade rests firmly against the section you intend to remove. This prevents accidental damage to other parts of the plant, maintaining its overall structure and health. It’s important to apply steady pressure while cutting; hesitating or using uneven force can result in jagged cuts that harm the plant and impede healing.
For maximum control and precision, grip the pruning shears firmly with both hands. This stability allows you to maintain the correct angle and positioning throughout the cutting process.
Post-Cut Maintenance
After you finish using your pruning shears, immediately clean them with warm, soapy water to eliminate sap and debris. This initial step is crucial for keeping your shears in optimal condition and prepares them for further maintenance procedures.
Post-cut maintenance doesn’t stop with just a quick wash. Here are the next essential steps:
- Dry thoroughly: After cleaning, dry your shears completely to prevent any rust formation. Use a clean, absorbent towel to remove moisture from all parts, particularly around the pivot points and locking mechanisms.
- Apply oil: Regularly oiling these critical areas ensures that your pruning shears remain smooth and functional. Choose a suitable lubricant designed for garden tools to provide the best protection against wear and corrosion.
- Use a wire brush: To remove any remaining sap build-up that wasn’t washed away, gently scrub the blades with a wire brush. This action helps maintain the integrity of the cutting edge and enhances performance.
Sharpening the Blades
To ensure your pruning shears perform optimally, you’ll need to select the right sharpening tools; a sharpening stone or a specialized file often yields the best results.
You must maintain a consistent angle between 20 to 30 degrees while sharpening to achieve a fine edge.
Proper technique involves removing any burrs or irregularities, ensuring smooth, clean cuts through your plants.
Selecting Appropriate Sharpening Tools
Choose a sharpening stone or file specifically designed for pruners to ensure the blades maintain their optimal sharpness. It’s crucial to select the right tools for sharpening your pruners, as the wrong type can damage the blades and compromise their efficiency.
When searching for the ideal sharpening stone or file, consider these elements:
- Material: Opt for a diamond or ceramic stone. These materials are hard enough to handle the tough steel of pruner blades without wearing down quickly.
- Grit Size: Use a coarse grit to repair damaged or very dull blades and a fine grit for regular maintenance and honing. This ensures the blade’s edge is restored without removing more material than necessary.
- Shape: Choose a stone or file that matches the curvature of your pruner’s blades. A slightly curved or flat file will suit most standard pruners.
Proper Sharpening Technique
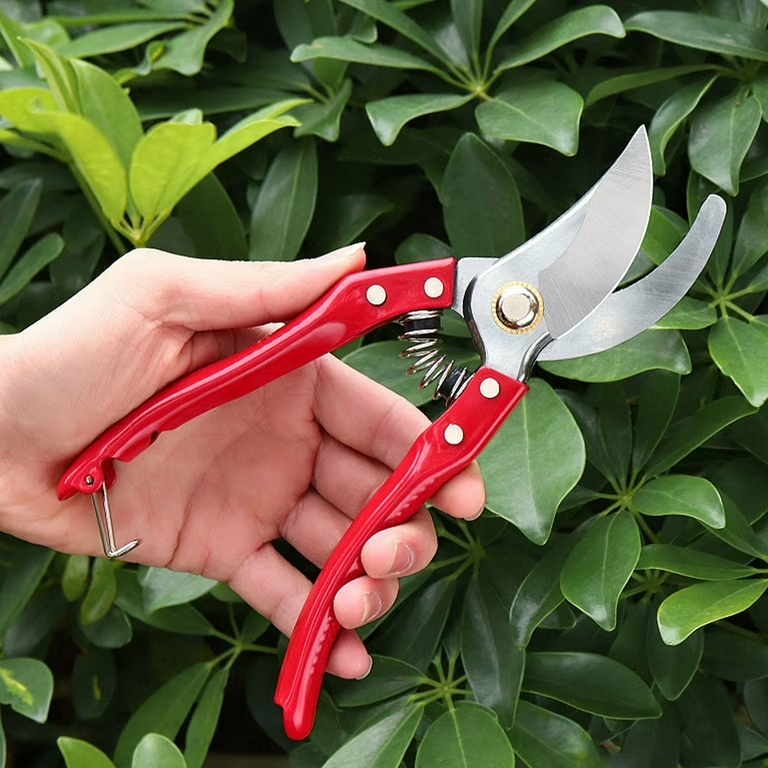
Regularly sharpen your pruning shears using a carefully chosen stone or file, maintaining a 20-25 degree angle to ensure optimal effectiveness and durability of the blades. This sharpening technique is crucial for maintaining the blades’ cutting efficiency. Begin by inspecting the blades for any signs of wear or damage. Identifying issues like nicks or burrs early can prevent further deterioration and ensure a smoother sharpening process.
Place the blade against the sharpening stone or file, aligning it at the recommended angle. Use steady, even strokes to sharpen the cutting blade and the counter blade. Remember, consistency in your stroke pressure and angle is key to achieving a sharp, efficient cutting edge. It’s important to sharpen both blades to maintain balanced cutting performance, reducing the effort you need for each cut.
After several strokes, check the sharpness of the blade by carefully running your thumb perpendicularly across the edge. You should feel a uniform sharpness along the blade. Wipe the blades clean to remove any metal filings and test the shears on a few small branches to ensure they’re delivering clean, precise cuts.
Properly sharpened blades help prevent crushing or tearing of plant material, enhancing your overall pruning experience.
Storing Shears Correctly
Ensure you store your pruning shears in a dry, clean environment to avoid rust and maintain their functionality. Moisture is the enemy of metal tools, and even a small amount can lead to corrosion of the cutting mechanisms. Properly storing shears not only extends their life but also ensures they’re always ready for use.
When considering how to store your shears, keep these key aspects in mind:
- Placement: Hang your shears on a hook or pegboard. This keeps them off damp surfaces and reduces the risk of misplacement. Ensure the location is easy to access yet out of reach of children.
- Protection: Use a sheath or blade cover. This not only protects the blades from environmental damage but also prevents accidents. A cover is essential if you’re transporting the shears.
- Position: Always store shears with the blades closed and locked. This safety measure prevents unintended cuts and preserves the tension in the spring mechanism.